
Microfiber Towels Description
Introduction
Microfiber fabric is made from polyester-nylon blended yarn.
Technically, the term microfiber applies to a fiber that is one (1) denier or smaller. The smaller the denier measurement, the finer and more efficient the microfiber is. Finer microfiber measures zero point one three (0.13) denier.
In other words, microfiber is divided many times smaller than a human hair, making it a superior tool for cleaning and germ removal. It is because microfiber penetrates cracks and crevasses that cotton cloths or paper towels are unable to reach.
In addition, the increased surface area of the microfiber fibers and their star shape enables them to absorb up to seven (7) times their weight in liquid (University of Washington Department of Environmental & Occupational Health Sciences, 2011).
Physical and Mechanical Properties of Microfiber
Microfibers are specified by their remarkable properties, including luster, pleasant softness and handle (a silken, luxurious touch), good drapability, and outstanding surface properties.
Microfibers also have high strength properties, ultra-fine linear density, shrink resistant, and are hypoallergenic (microfibers do not create problems for those suffering from allergies).
Microfibers insulate well against wind, rain, and cold (Kellie, 2016).
Antimicrobial agents can be added in a microfiber to assist in safeguarding the wearers from the hazards of bacteria (that cause odor) and mildew.
Polyester is lyophilic, meaning it attracts dirt and oils. It is the scrubbing and cleaning fiber.
Nylon is hydrophilic, meaning it absorbs water. It is the absorbing and quick drying fiber (Calderon Textiles, 2020; Kellie, 2016).
Microfiber fabrics are typified by high cleaning efficiency. They have high surface area: They can have up to 200,000 fibers per square inch. These fibers are mechanically created through splitting process.
Microfiber fabrics, therefore, have 40 times more cloth surface, making it possible to clean dust, grease, water, or oils with a single swipe of the microfiber cloth/towel (Calderon Textiles, 2020).
Hence, microfiber fabrics are more desirable than cotton fabrics.
There are more reasons why small fibers, microfibers, clean better. Small fibers attach themselves to smallest, most microscopic dirt particles. These are the dirt particles that ordinary cloth fibers, such as cotton, brush past (the ordinary fibers do not pick the microscopic dirt particles).
In the event that you were able to see the forces, you would see the existence of adhesive forces between microfibers and dirt. The adhesive forces are forces of attraction. More specifically, the forces are known as van der Waals forces (Woodford, 2020).
The van der Waals forces explain why geckos are capable of sticking themselves to ceilings using millions of tiny hairs present on their toes (Sanders, 2002).
There is a microscopic quantity of van der Waals force between one microfiber and any particular dirt particle. Nonetheless, it is crucial to keep in mind there are millions of small fibers in a microfiber cloth/towel.
Hence, the entire sticking impact is increased dramatically. It is the reason why dirt, dust, and other materials are effectively removed by microfiber cloths/towels. Furthermore, it is the reason why you should effectively clean microfiber towels after using them (Woodford, 2020).
Technically, microfiber fibers do not absorb water similar to how cotton fibers absorb. Instead, microfiber fibers merely trap water into conduits in the fibers.
Microfiber soaks liquids through capillary effect. Capillary effect is a phenomenon in which liquid flows in the opposite direction of gravity via channels in the fabric.
The microfiber fibers surround and lock the water molecules. The water molecules are thus prevented from escaping (Calderon Textiles, 2020).
In addition, the capillary effect existing between fibers results to formation of suction. The suction allows microfiber to clean as well as polish simultaneously (Department of Health, n.d.; University of California San Francisco, 2015).
Microfibers dry in one-third of the time of ordinary fibers. The reason is that water is simply pushed out of the caverns where it is held instead of having to dry in the usual way after it has been absorbed by saturated fibers.
The microfibers are woven or knitted tightly. They thus possess greater durability when properly used and maintained (Calderon Textiles, 2020).
Microfibre yarns have a low lint-shedding tendency. One reason can be due to the higher flexibility of the microfibers. The flexibility retains them in a coherent structure (Kellie, 2016).
Unlike cotton, microfiber cloth/towel leaves no lint behind on surfaces (Niz, 2020).
How Microfiber Cleaning/Washing Towels/Cloths Work
Fibers of a microfiber towel generate a static electric charge when moved across a surface. The result is that they attract dust and contain it, rather than spreading the dust around or releasing it into the air (particularly when dry dusting).
In other words, the fibers are positively charged. As such, they attract dirt (negatively charged) similar to a magnet.
Because the fibers are very small, they manage to penetrate cracks, crevices, in addition to microscopic pores of many materials.
Microfiber towels/cloths lift the dirt or liquid from the surface you are cleaning. Consequently, the towels store the dirt or liquid in the towel until the towel is washed (Decitex, n.d.; University of Washington Department of Environmental & Occupational Health Sciences, 2011).
Notably, a microfiber cloth/towel can be used wet or dry (Calderon Textiles, 2020).
Benefits of Microfiber Cleaning/Washing Towels/Cloths
Microfiber cleaning cloths, towels, and mops work well for removing organic matter (dirt, oils, grease…) and germs from surfaces. Apparently, their cleaning ability is because of two key characteristics: more surface area and a positive charge (University of California San Francisco, 2015).
Key benefits are:
a. Efficient at Capturing Microbes
Numerous studies have revealed microfiber is better than cotton at capturing bacteria. For example, the University of California Davis Medical Center contrasted bacteria amount collected by a cotton-loop mop and a microfiber mop.
The cotton-loop mop decreased bacteria on the floors by 30%. In stark contrast, the microfiber mop decreased bacteria by 99% (University of Washington Department of Environmental & Occupational Health Sciences, 2011).
A study was carried out about microfiber mop use in hospitals. The study revealed a microfiber mop head used with a detergent cleaner removed bacteria as effectively as a cotton mop head used with a disinfectant (University of California San Francisco, 2015).
b. Decreases Chemical and Water use more efficiently
A study was carried out by University of Massachusetts Lowell. For the study, due to the fact that the microfiber mopping system uses less water and chemicals, the system offered two benefits: The first is that it decreased the amount of water and chemicals handled.
The second benefit is that it did away with the need to squeeze the heavy cotton mops, leading to less probability for employee's injury/ies (University of Washington Department of Environmental & Occupational Health Sciences, 2011).
Apparently, microfiber products are positively charged. They, therefore, attract negatively charged dirt and grease. These aspects of microfiber enable you to clean surfaces with less or even without chemicals (University of California San Francisco, 2015).
c. Prevents Growth of Bacteria
Unlike cotton, a microfiber cloth dries fast, making it hard for bacteria to grow in it (University of California San Francisco, 2015).
d. Lasts Long
Microfiber lasts longer than cotton. Microfiber may be washed many times before losing its effectiveness (University of California San Francisco, 2015).
e. Avoids Cross-contamination
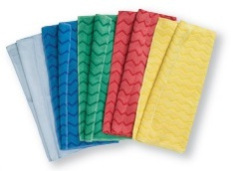
Microfiber cloths and mops are available in various colors. As such, a color-coding system may be executed for particular uses.
For example, in bathrooms, pink cloths may be used for toilets.
Two, yellow cloths may be used for sinks.
Three, green cloths may be used for office cleaning (University of Washington Department of Environmental & Occupational Health Sciences, 2011).
Photo Credit: University of Washington Department of Environmental & Occupational Health Sciences (2011).
Different Colors of Microfiber Cloths/Towels
Types of Microfiber Cloths/Towels Weaves
Some towels are manufactured using yarn that form a pile or loop on the surface. These yarns are combined during the weaving/knitting process in a specific pattern. The piles/loops absorb and carry moisture into the base of the fabric for storage purposes.
Different weaves of microfiber cloths/towels are manufactured for specific groups of tasks for use in different industries/areas/places. Among them are at home, restaurants, cafes, salons, car (auto), aviation, retail, industrial, offices, places of worship (churches, mosques...), and among others (Miller, 2020).
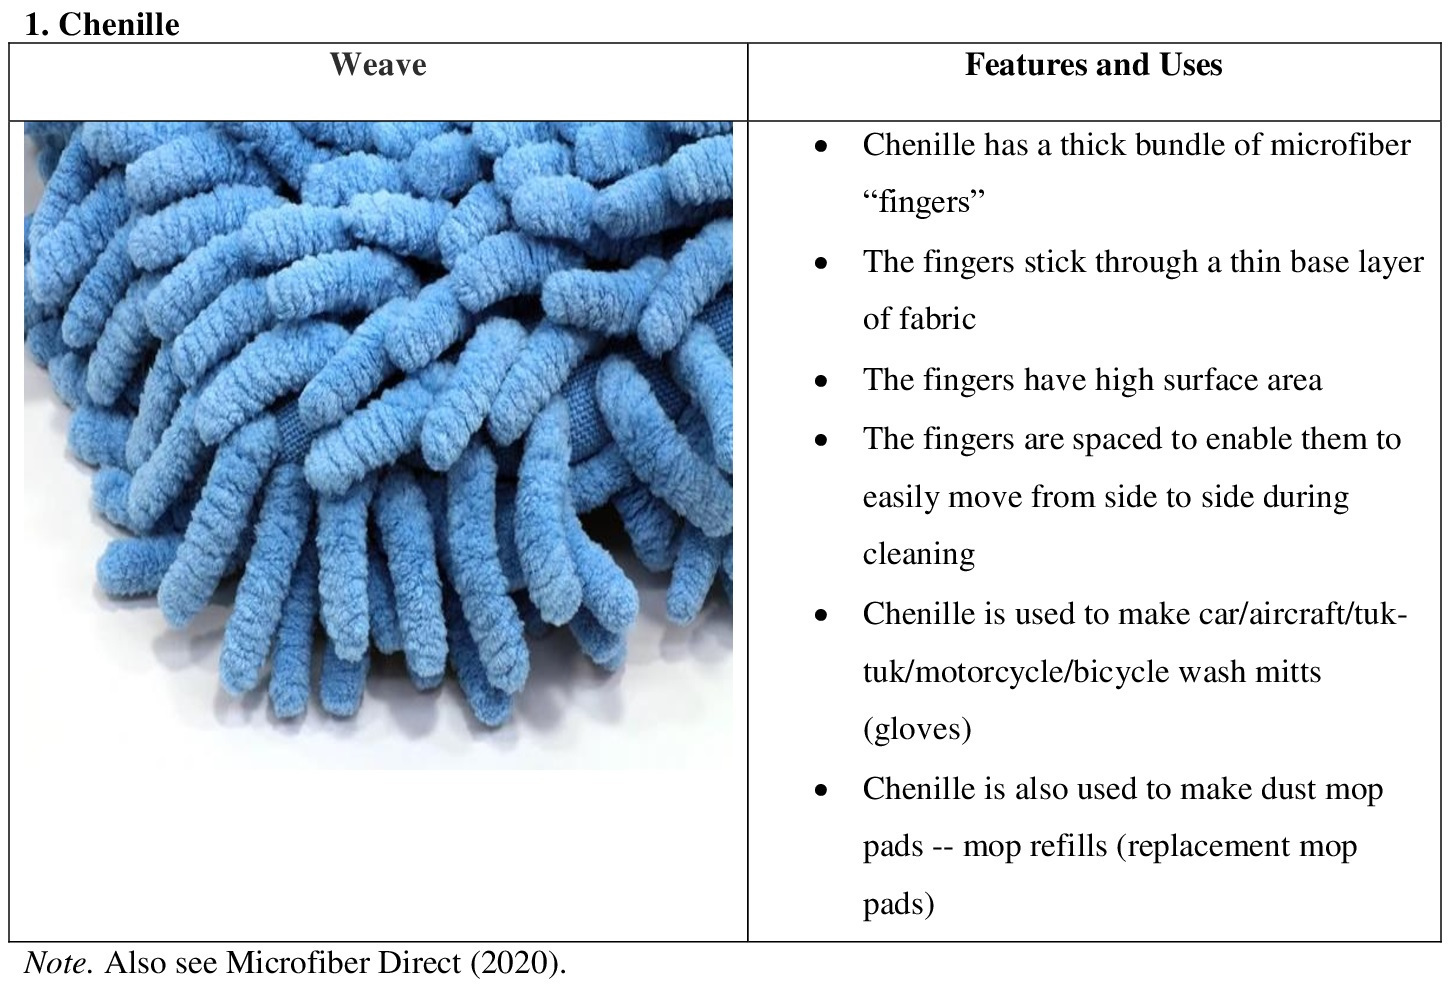
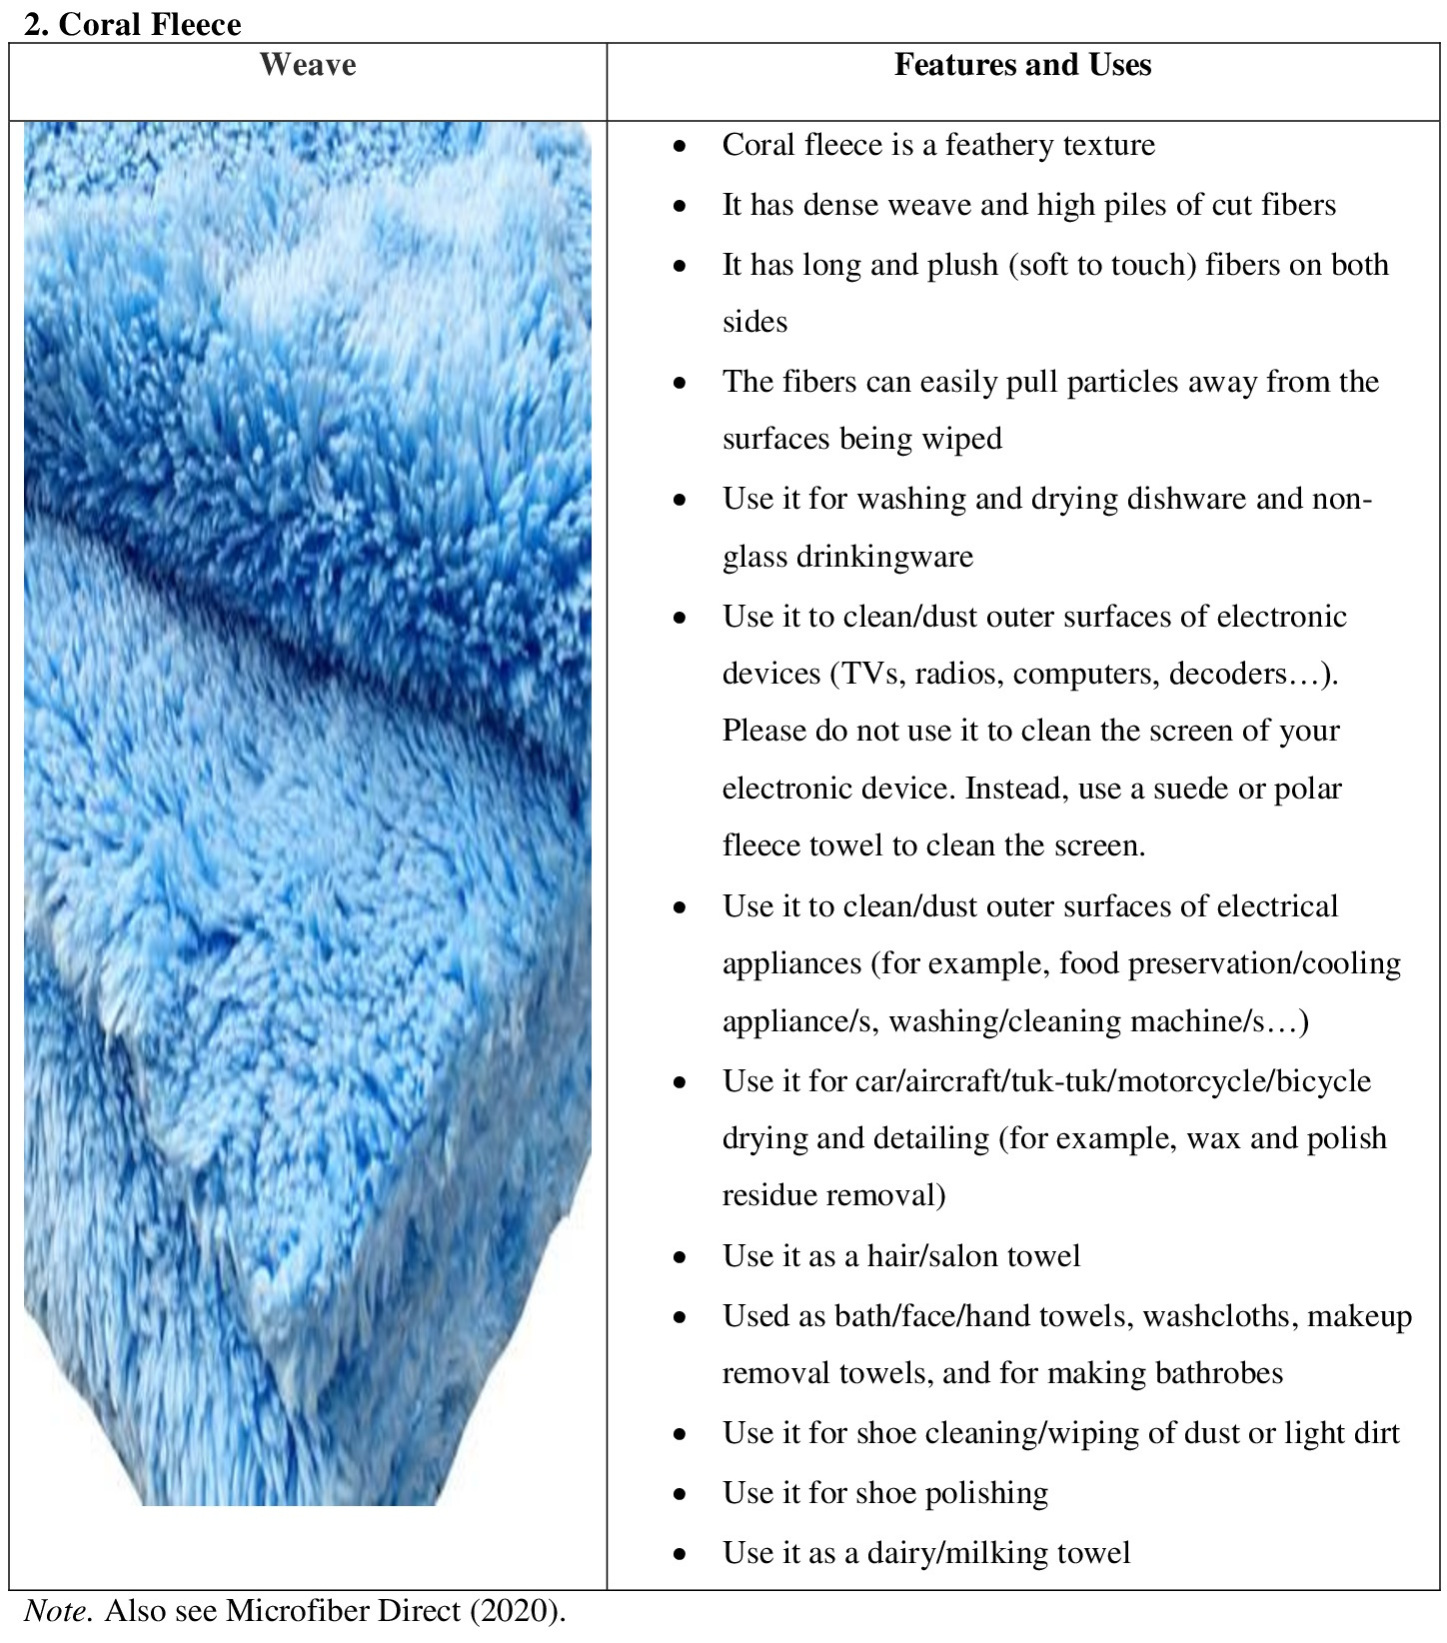
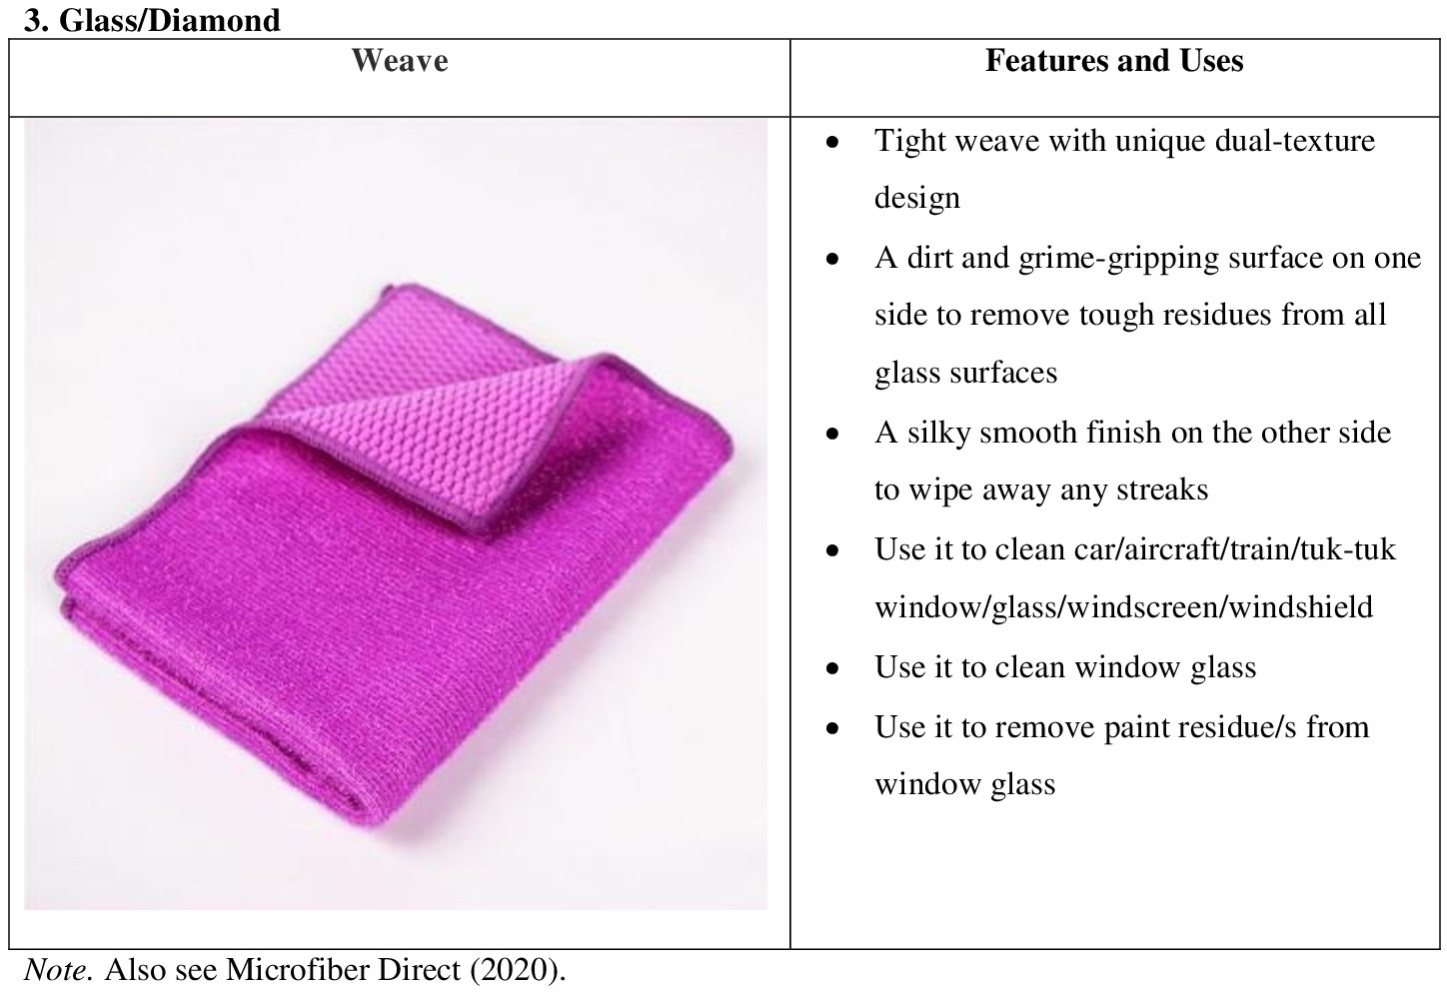
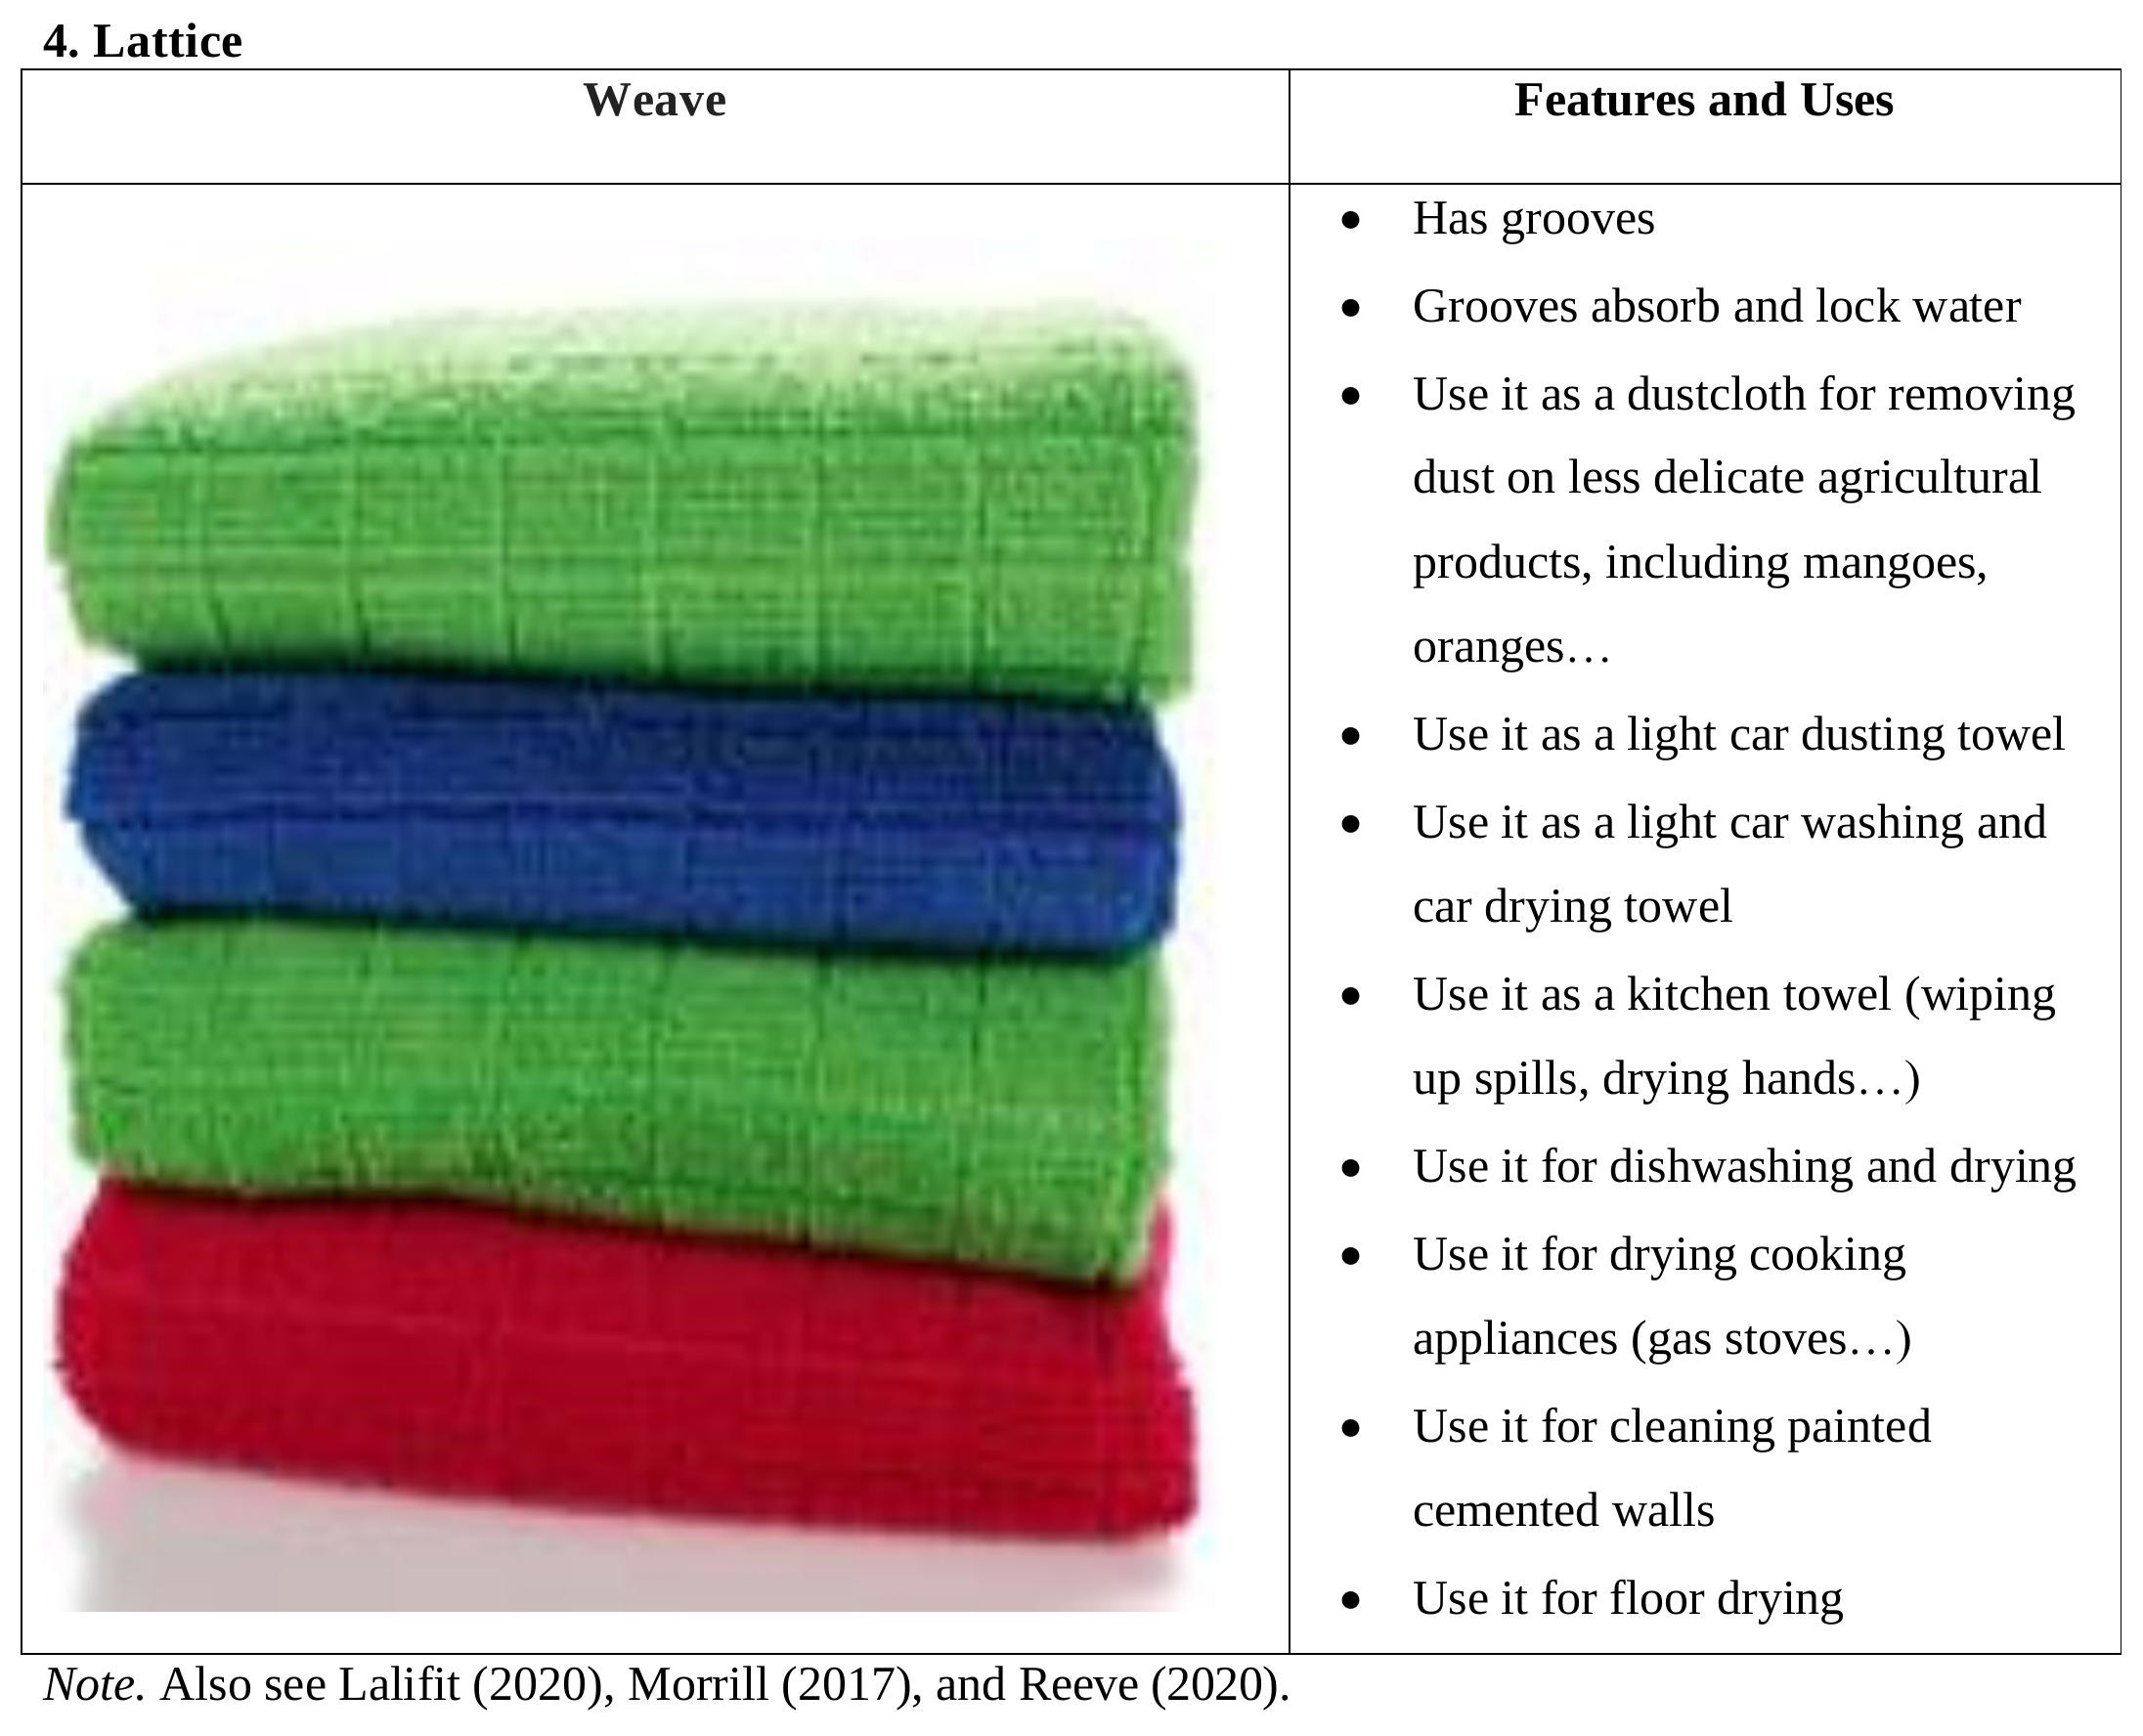
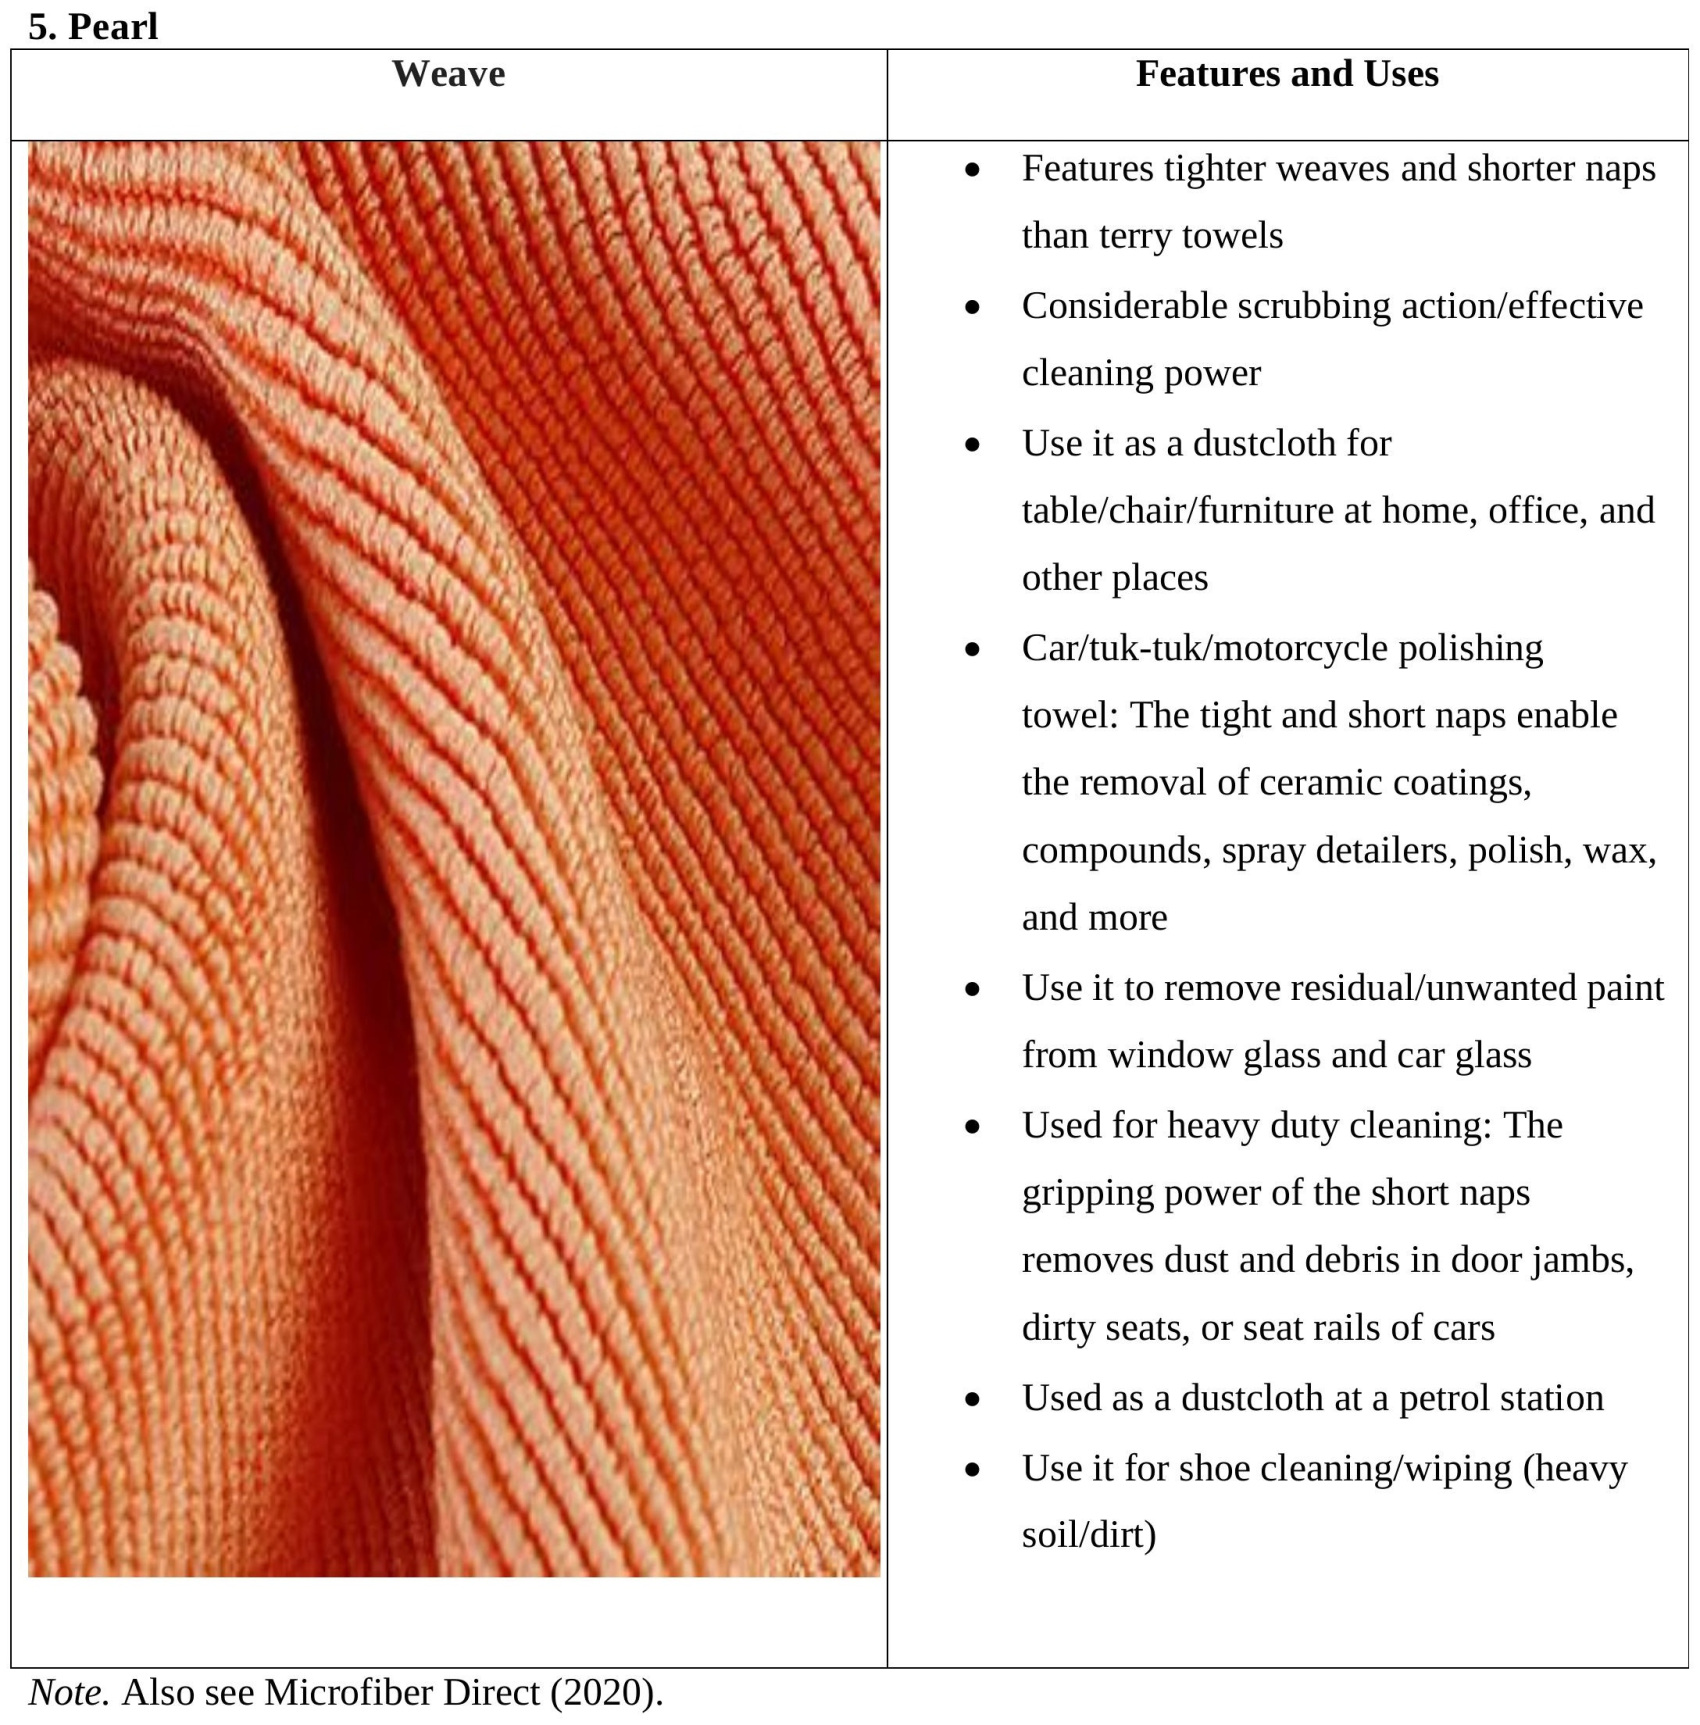
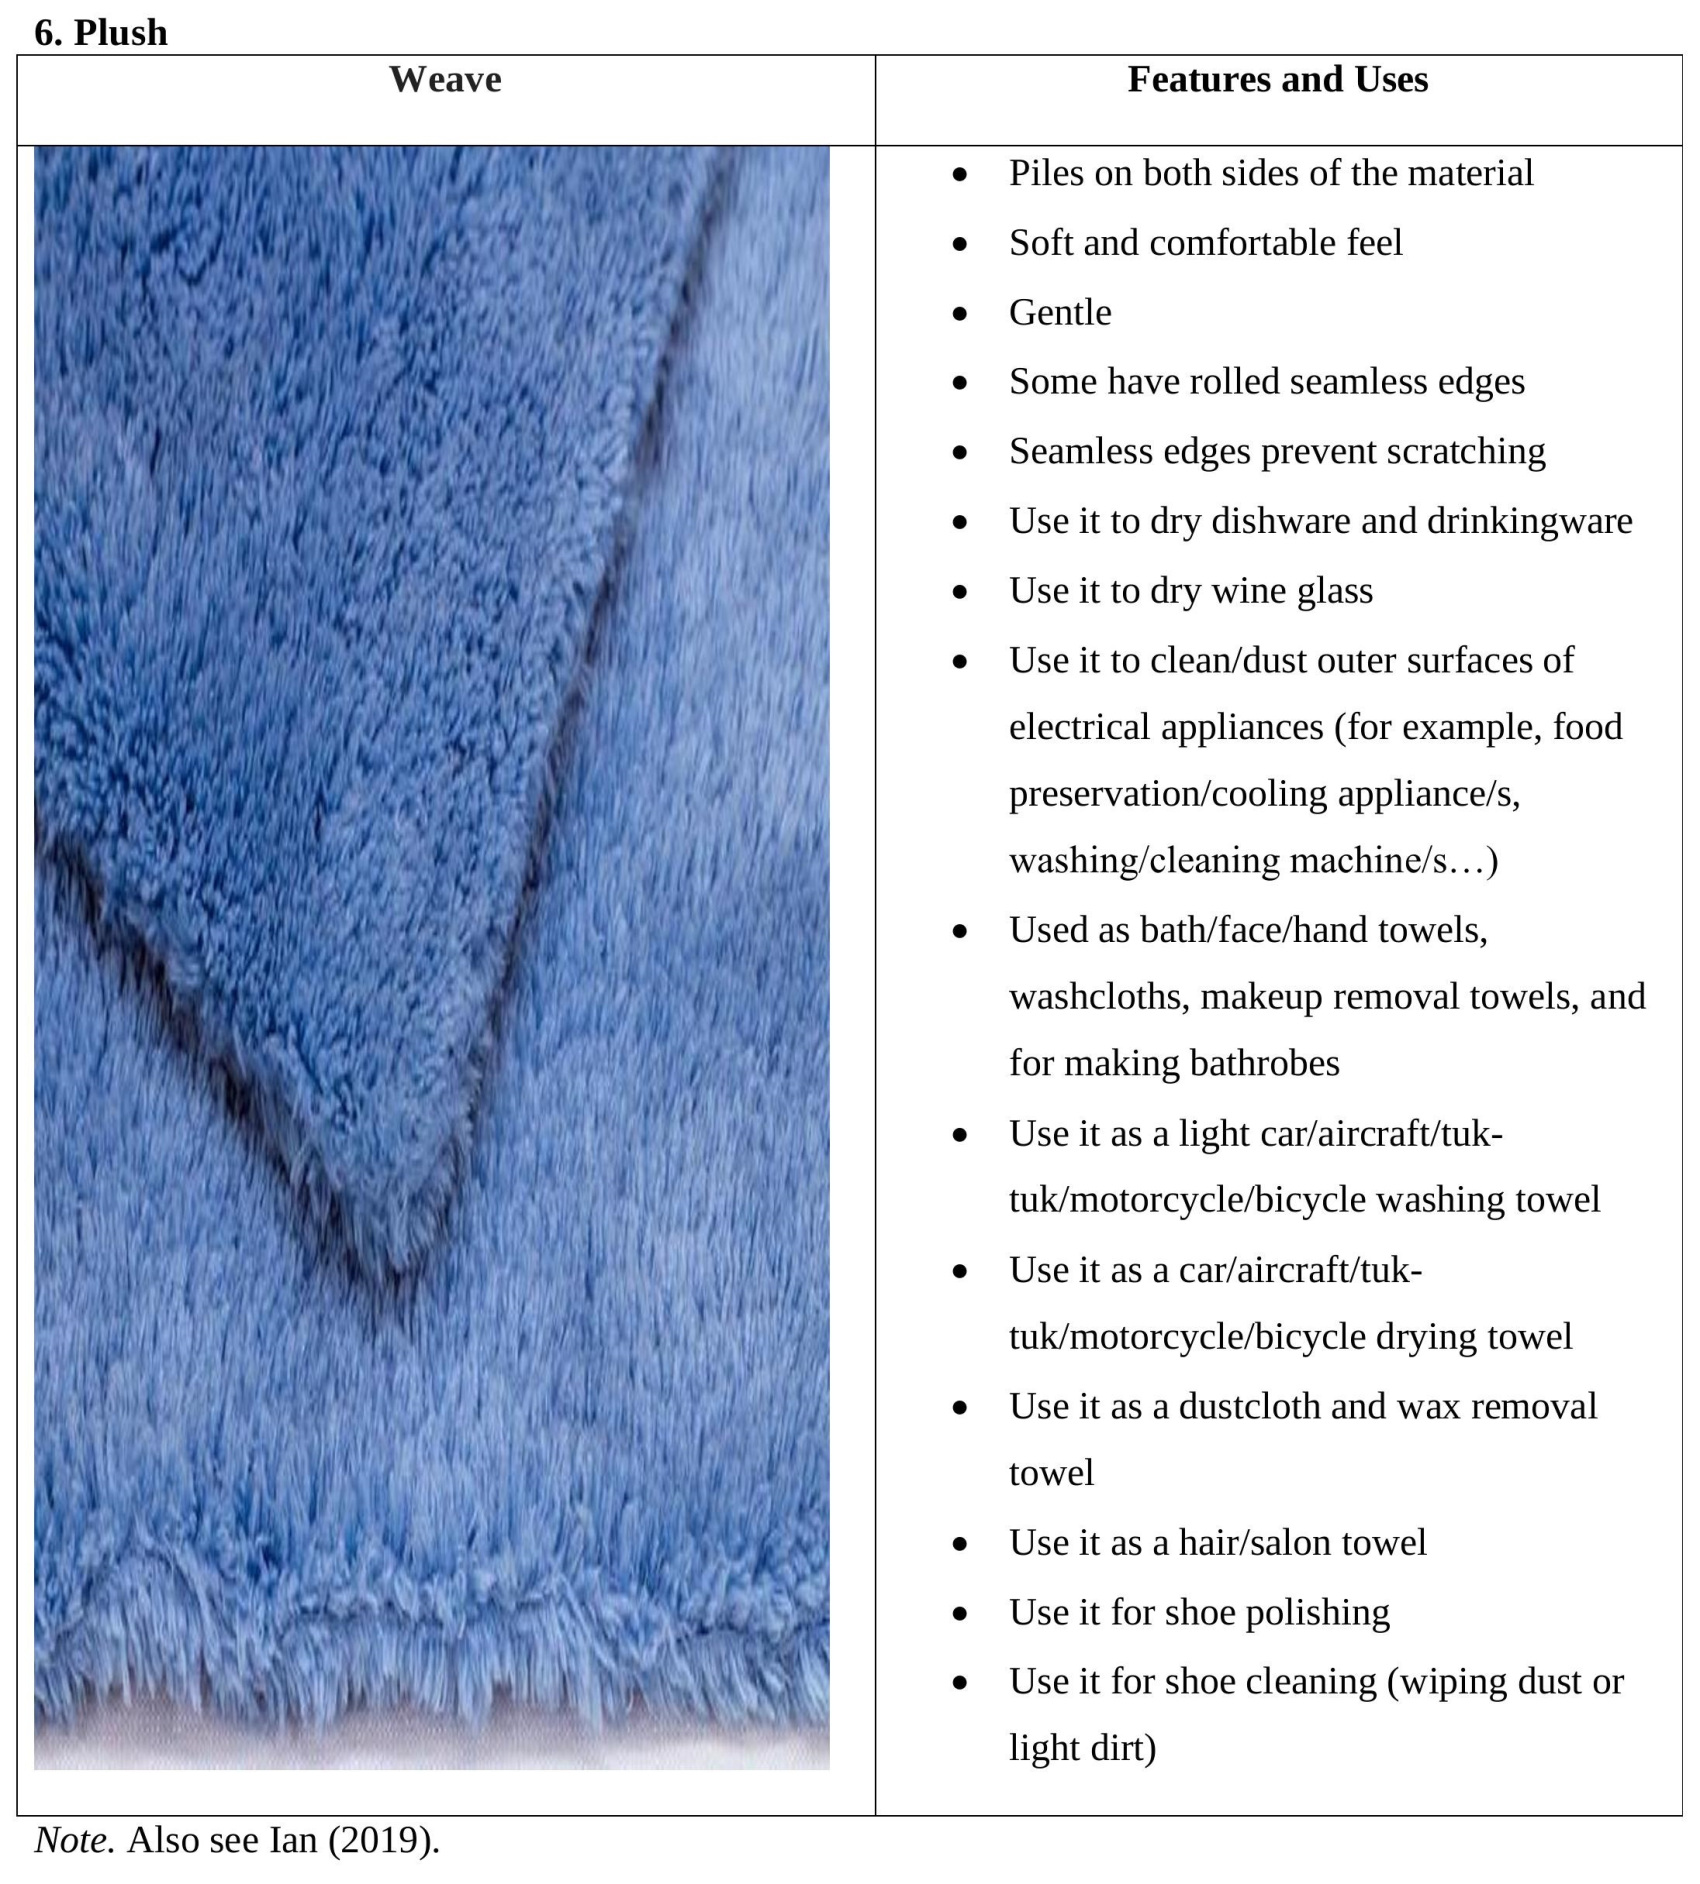
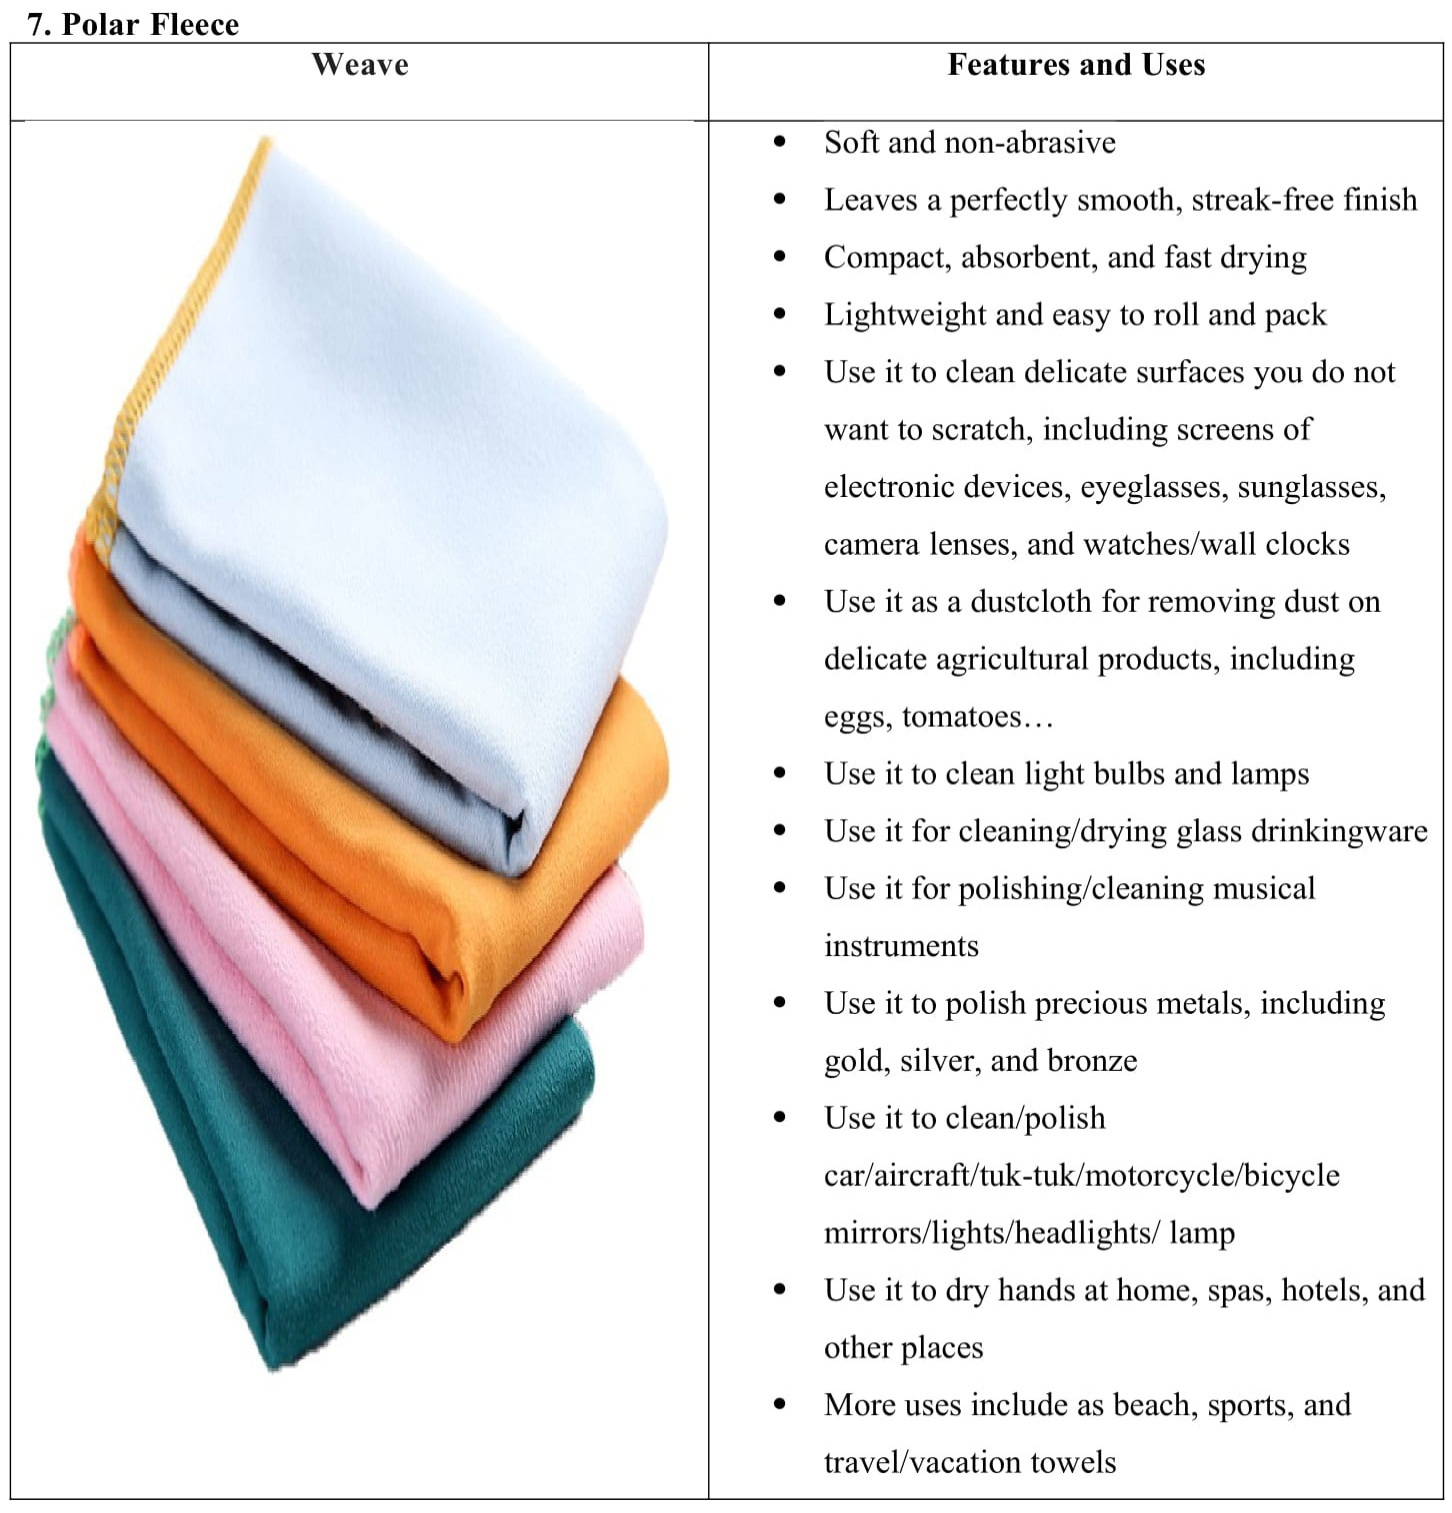
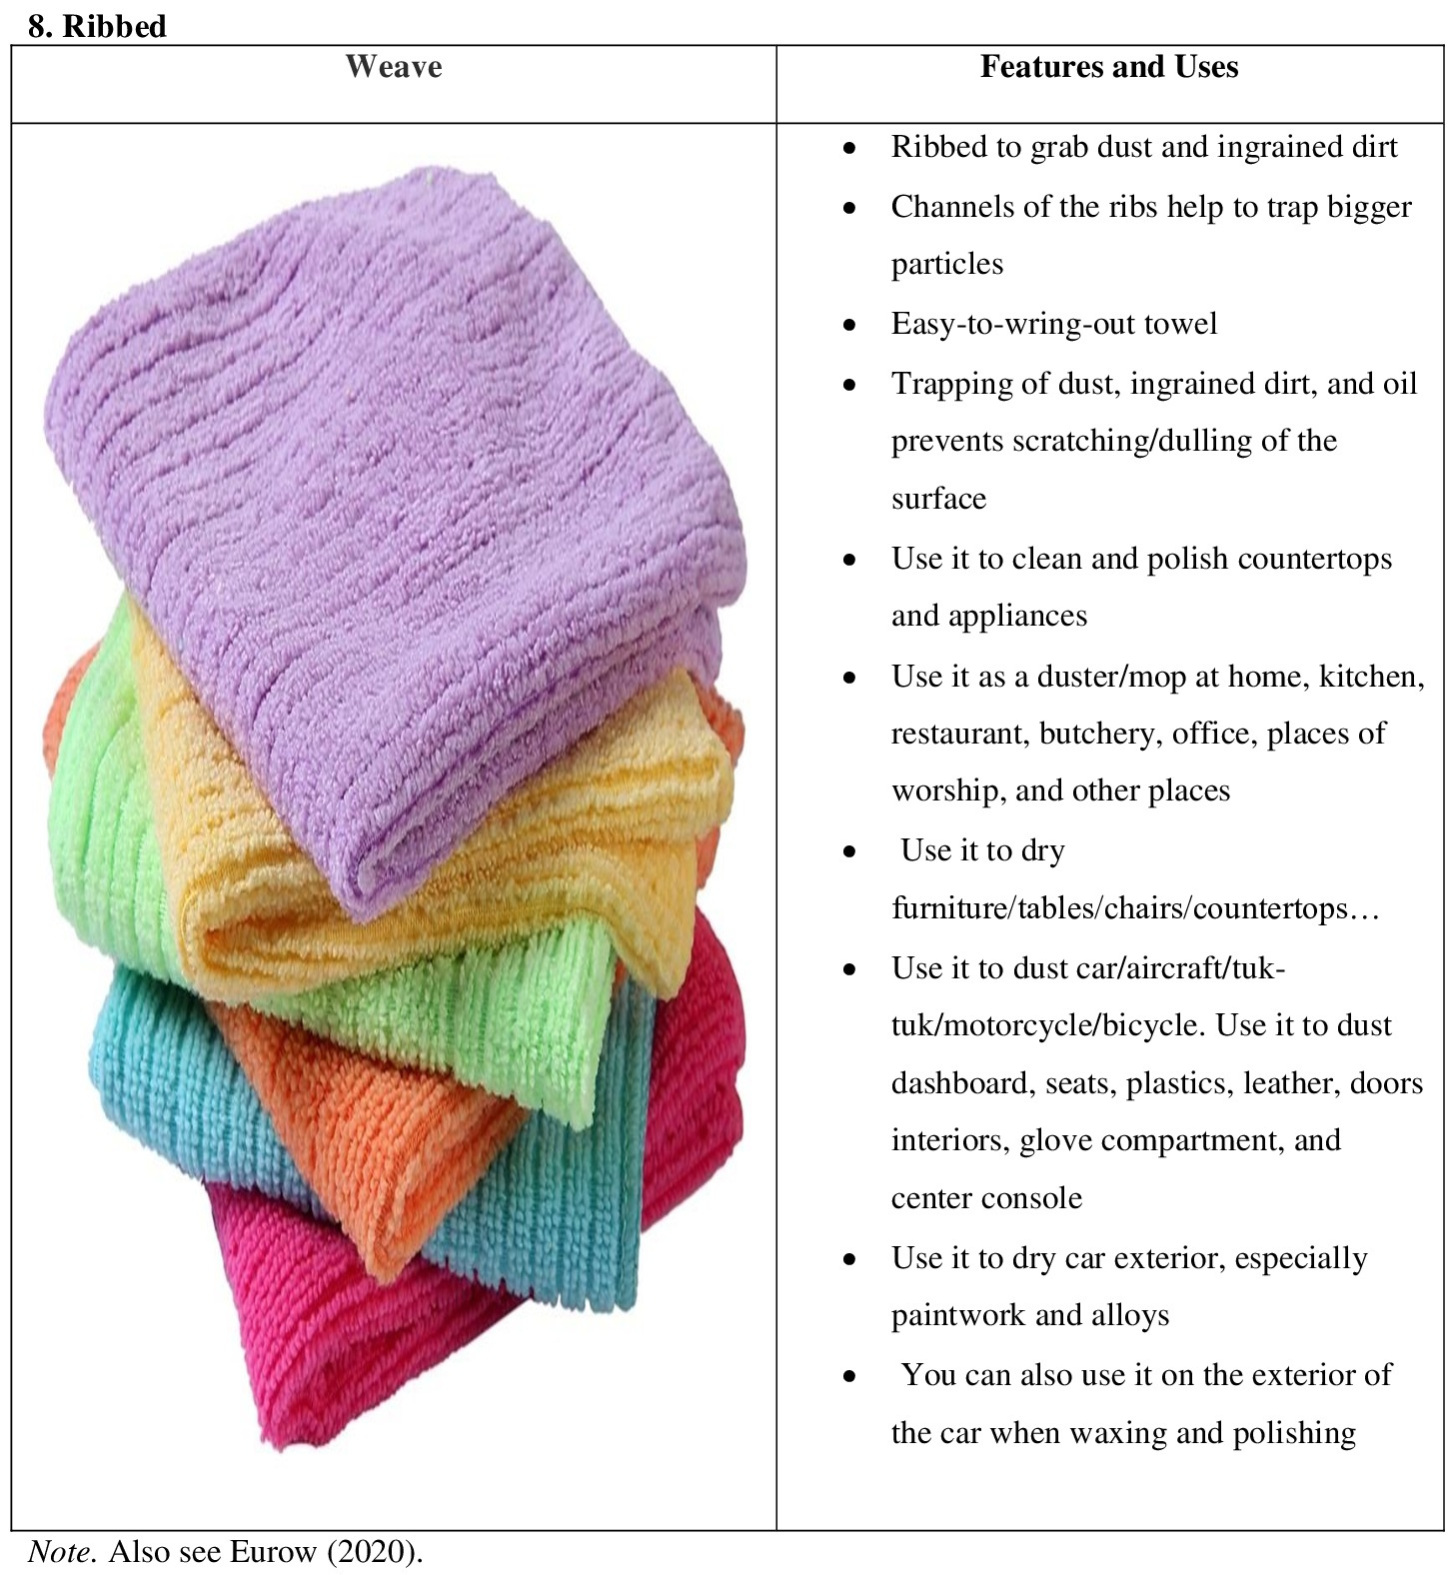
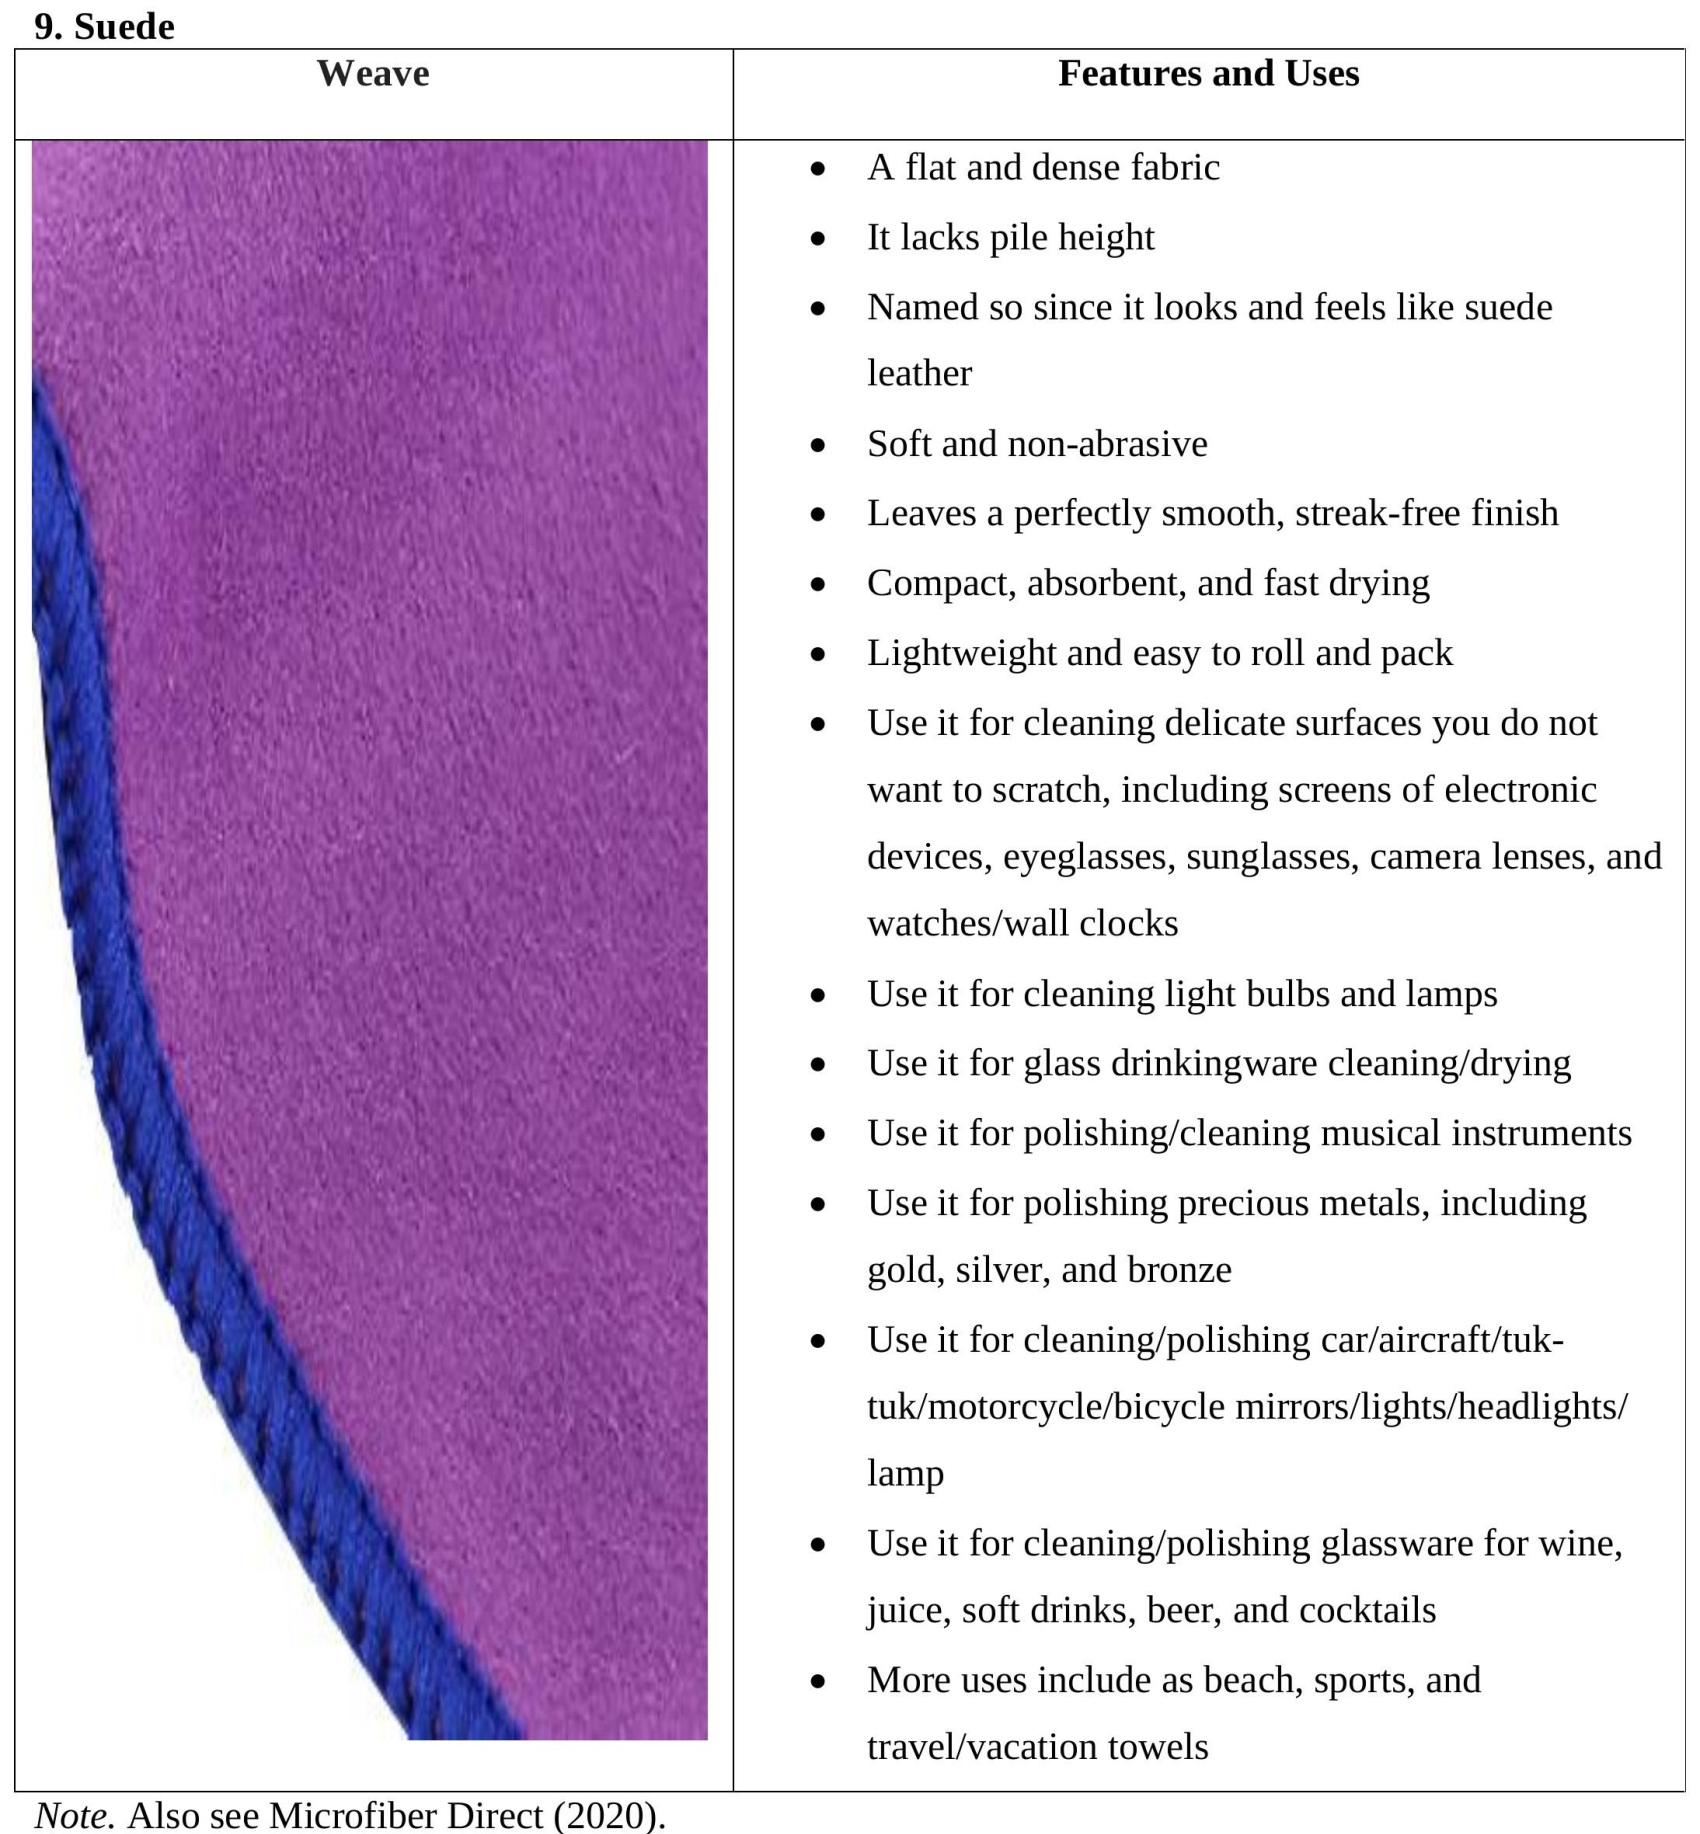
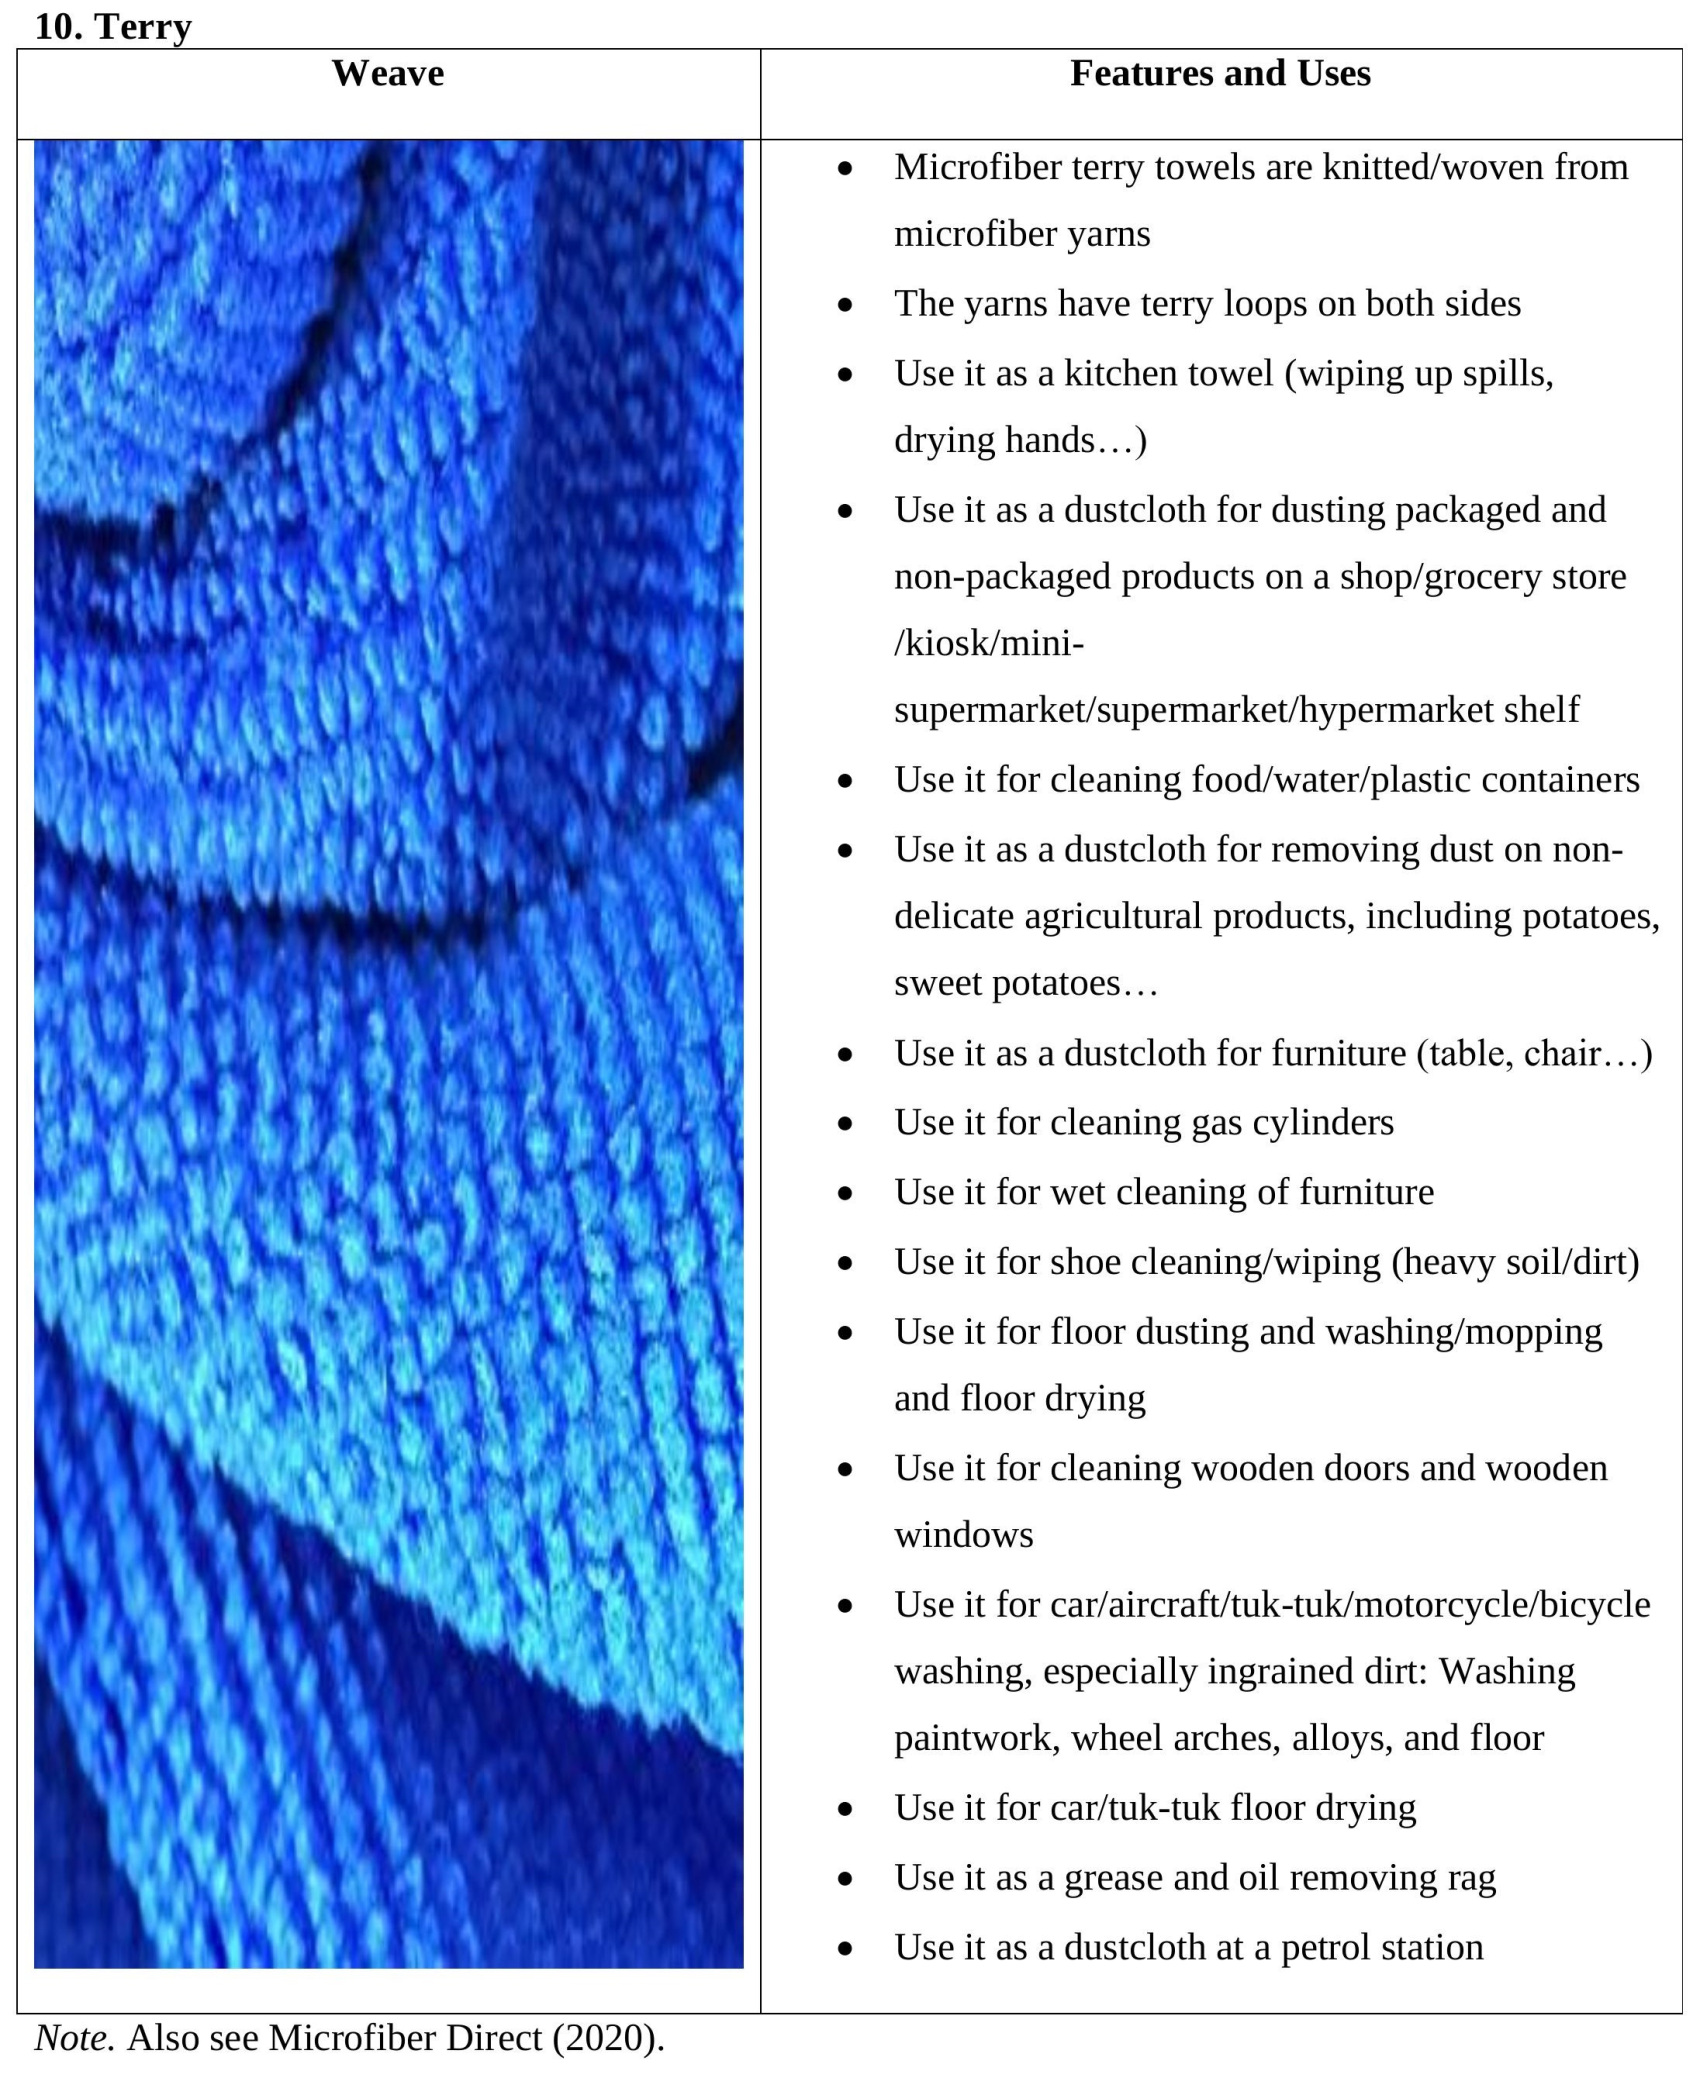
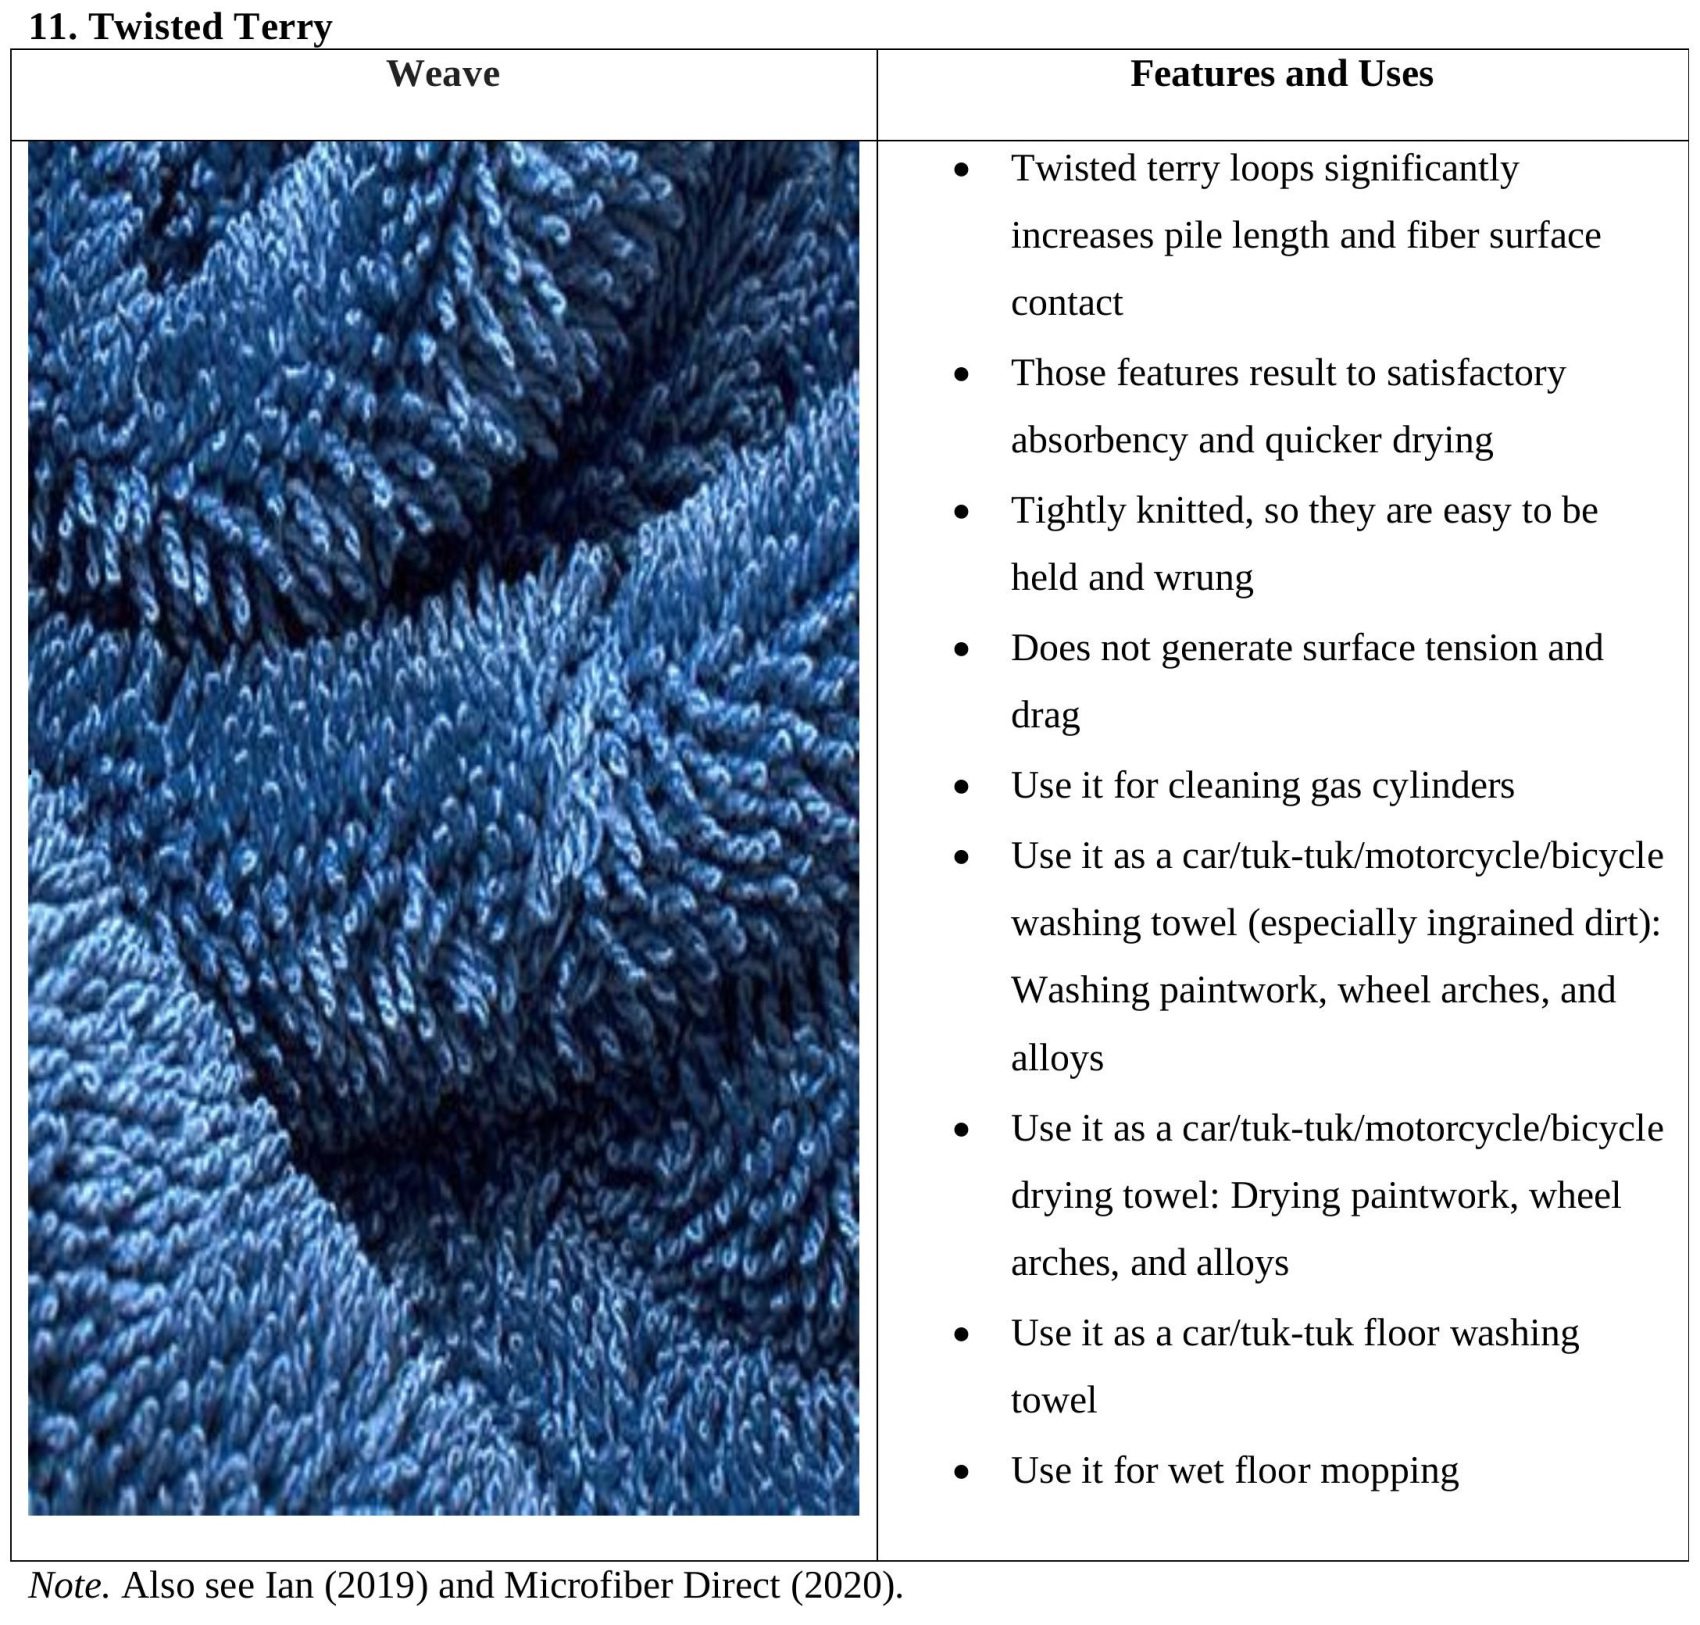
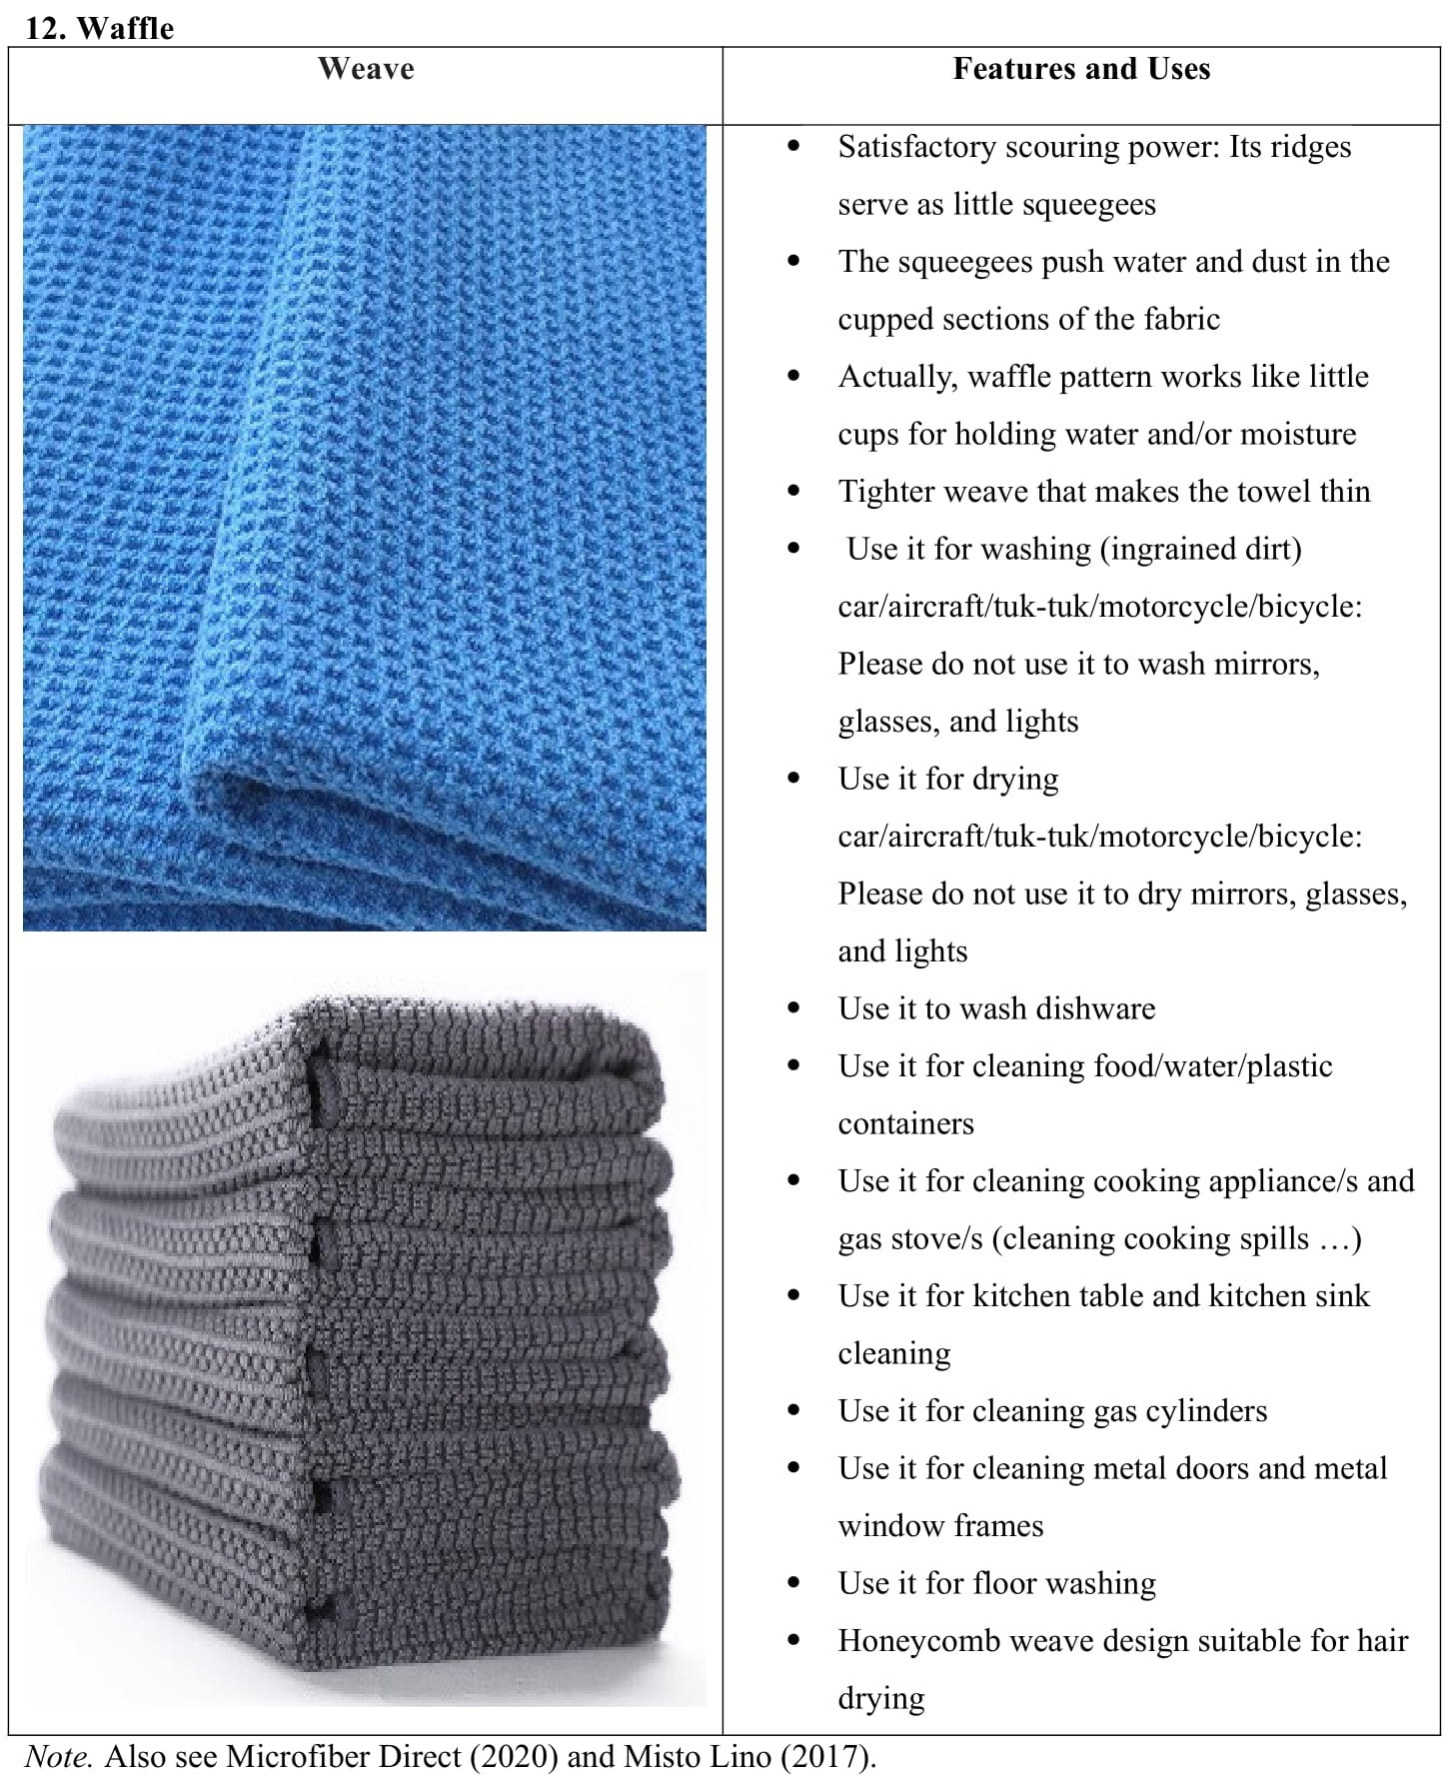
The microfiber weaves include chenille, coral fleece, glass/diamond, lattice, pearl, plush, polar fleece, ribbed, suede, terry, twisted terry, and waffle.
The microfiber weaves are described below:
Cleaning using Microfiber Towels/Cloths
At home, your workstation, religious institution, educational institution, health facility, and other places, include microfiber materials into your comprehensive cleaning and infection control program.
Frequently, clean surfaces with microfiber and a general cleaner to remove dirt and visible contaminants. Use wet microfiber mops and/or floor mopping towel to clean floors at offices, kitchens, bathrooms, tiled areas, and other areas.
Dusting cloths do not need polish or other chemical while removing up to 99 percent (%) of dust, dirt, and other materials.
Dust wands reach places that are hard to access. The wands remove the dirt and dust that have accumulated (University of Washington Department of Environmental & Occupational Health Sciences, 2011).
A. Surfaces
Use microfiber for cleaning counters, stovetops, furniture, and other surfaces. In comparison to most other cloths/towels, tiny fibers of microfiber cloths/towels collect more dirt and food residue.
Microfiber cloths/towels may be used with a third-party cleaner or a disinfectant (University of California San Francisco, 2015).
B. Floors
Microfiber mops have easy-to-remove heads. Mop heads are lightweight and much simple to wring out. The result is a cleaner floor with much less water left on the floor to dry (University of California San Francisco, 2015).
C. Windows
With microfiber, the microfiber cloth/towel and water can be necessary to clean windows. The microfiber towel/cloth may also help to de-streak windows. The microfiber towel/cloth eliminates the need for more toxic window cleaners.
Use just one Cafaibber Glass Microfiber Towel and water to wash/clean. You may use another glass microfiber towel to dry the window (University of California San Francisco, 2015).
D. Dusting
Use microfiber towels/cloths/wands to remove dust from products on shelf at a shop/store/market/supermarket/hypermarket/household, concrete walls, musical instruments, and other areas/surfaces/items.
As compared with cotton rags, microfiber cloths/towels trap much more. The result is that the dusting task is quicker and easier.
E. Human Body Drying
Microfiber bath towel has a thick and feathery feel. It creates a plush texture (it feels soft, too) that is significantly absorbent. The microfiber towel pulls water off your body.
Dry yourself in less time with the amazing Dry Skein Microfiber Bath Towel from Canagoza. As you move the towel over your skin, the millions of fluffy fibers will soak up water. The fibers will lock the water in to prevent dripping.
Add to the fact that the microfiber towel dries faster than cotton, thanks to the unique fiber content of the microfiber towel. Once you finish drying your body with the microfiber towel, it will dry within a short time period. The microfiber towel remains fresh since it dries at quick rate to discourage bacteria and mildew accumulation.
Apart from household use, microfiber towels are also valuable for camping, as sports towel, taking to the gym and beach, traveling, and more. Swimmers prefer microfiber towels since the towels absorb and dry quickly (City of Phoenix, 2020; Kellie, 2016; Sims, 2020).
F. Cars/Aircraft/Tuk-tuk/Motorcycle/Bicycle Cleaning
Apparently, microfiber towels comprise tiny strands. Each strand is roughly one percent the diameter of a human hair. The strands can be tightly woven to develop an ultra-absorbent material. The strands are strong and durable, making them ideal for car/aircraft/tuk-tuk/motorcycle/bicycle uses. They capture and pull away dirt and dust into their fibers, unlike most other fabrics, which spread dust and dirt all over the surface (Unrau, 2016).
It is recommended to have two plush/waffle/terry microfiber towels or terry sponges/chenille gloves. The first is for washing paintwork.
The second is for washing/cleaning wheel arches and alloys.
Thirdly, have one glass microfiber towel for cleaning glass.
Fourthly, have one or two suede towels for cleaning mirrors and lights.
For drying, have two lattice/ribbed microfiber towels from Canagoza for drying paintwork and inner of your car (though, one may suffice as discussed on the drying process below).
The second category is for drying the wheel arches and alloys (though, one may suffice as discussed on the drying process below).
The third towel is glass towel for drying glass (though, one may suffice as discussed on the drying process below).
The fourth is suede cloth for drying mirrors and lights (though, one may suffice as discussed on the drying process below).
Using different towels will prevent the likelihood of spreading grease and oil (and grit and other dirt) from areas like wheel arches and alloys to paintwork and inside your car. Grit can cause scratching of paintwork, mirrors, glasses, and lights (LMB Supplies, 2020).
Washing a Car
Part 1: Prepare your Car
Materials Required
(a) Bucket or car wash machine
(b) Car wash soap/detergent
(c) Cafaibber microfiber washing towel/glove/microfiber sponge, drying towel, glass cleaning towel, lights/mirrors cleaning towel, car floor cleaning, and car dustcloth
(d) Water source
Step 1: Select a location to wash your car
You need access to a plentiful source of water to wet your car, wash it, and rinse it when you are done. Find a spot that is shady, if possible.
Direct sun can dry the car wash soap/detergent onto your paintwork/body before you get a chance to rinse it off.
If no shady locations are available, wash smaller areas of your car at a time to prevent drying issues.
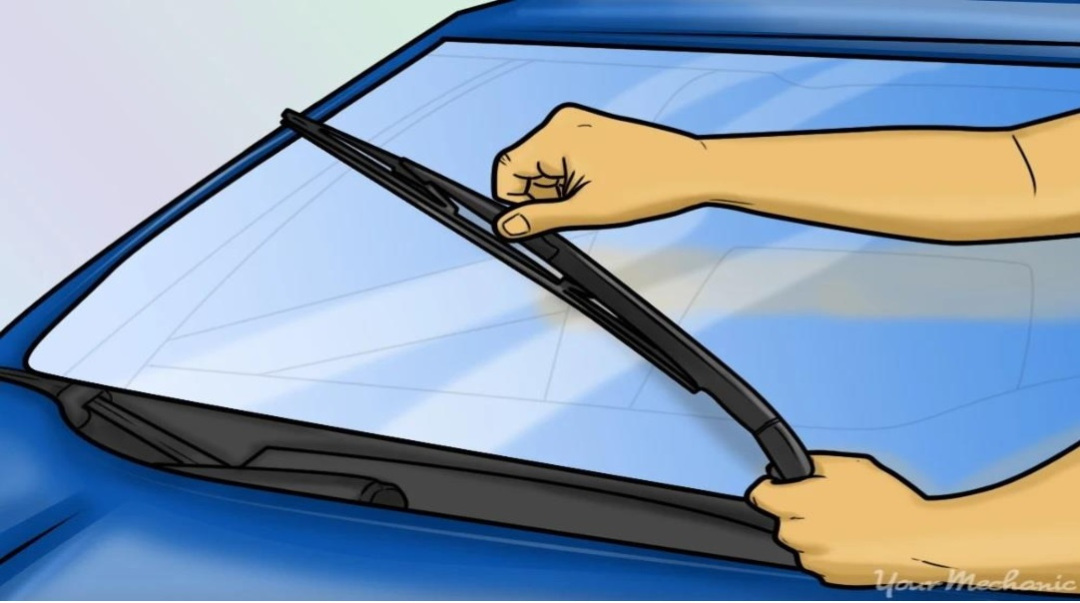
Step 2: Lift your wiper arms
To clean your windows comprehensively, lift the wiper arms upright to access almost the entire windshield.
Photo Credit: Unrau (2016)
Step 3: Prepare your wash supplies
(a) Fill your bucket with water, if possible, warm water, but cool water will suffice, as well
(b) Add car wash soap/liquid detergent based on instructions on the soap/liquid detergent package/container
(c) Stir it to get the water sudsy (sudsy means full of bubbles/frothy/foamy)
(d) Soak a Cafaibber microfiber towel/chenille glove/microfiber sponge in your bucket
Step 4: Rinse the exterior with water to remove any loose dirt
Apply water to the entire car, including all the windows and the wheels. While applying water, pay special attention to areas having dirt accumulation (Unrau, 2016).
Part 2: Wash your Car with a Cafaibber Microfiber Towel/Chenille Glove/Microfiber Sponge
Step 1: Wipe every panel with your soapy microfiber towel/chenille glove/sponge
Begin at the top of the car and continue downward. Squeeze most of the excess water out of the Cafaibber towel/glove/sponge.
In the event that there are particularly soiled panels, aim to wash them last.
Step 2: Wash the roof
Start washing. Wash the top of the car first. Rinse the top as soon as you finish, making sure the detergent does not dry on the paintwork of your car (do so in case you are washing in direct sunlight or the temperature outside is warm).
Step 3: Wash one panel fully at a time
Wash one panel at a time. Rinse after washing in case you are washing in direct sunlight or the temperature outside is warm. If the water is not drying too fast, finish one whole side of the car before drying.
Notably, wash glasses using a Cafaibber Glass Towel. Simultaneously, clean mirrors using Cafaibber Mirror/Lamp/Headlights/Screen Cleaning Towel.
Meanwhile, if the water is drying quickly, dry each panel, using a Cafaibber drying towel (lattice or ribbed) as soon as you finish washing (Jackson, 2020).
Photo Credit: Unrau (2016)
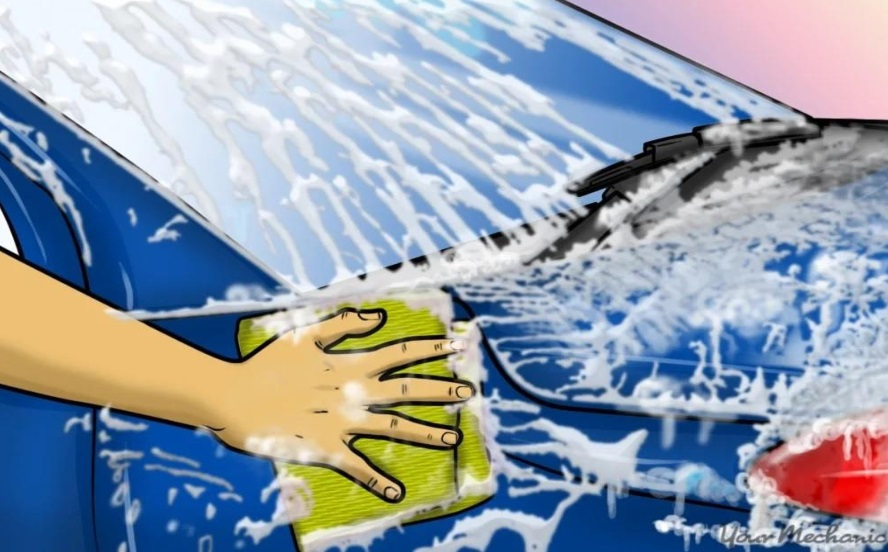
Step 4: Use open hand for high surface area
Use a broad, open hand in the towel to cover the most surface area possible within the shortest timeframe. Clean the wiper blades and arms with the towel.
Please do not put the arms down yet (Unrau, 2016).
Step 5: Rinse your microfiber towel often
Rinse your towel in your soapy water each time you wipe a relatively dirty area. Remove from the towel any gritty bits that you can feel before continuing.
If your car is really dirty, you may need to use more than one cloth to finish the job (Unrau, 2016).
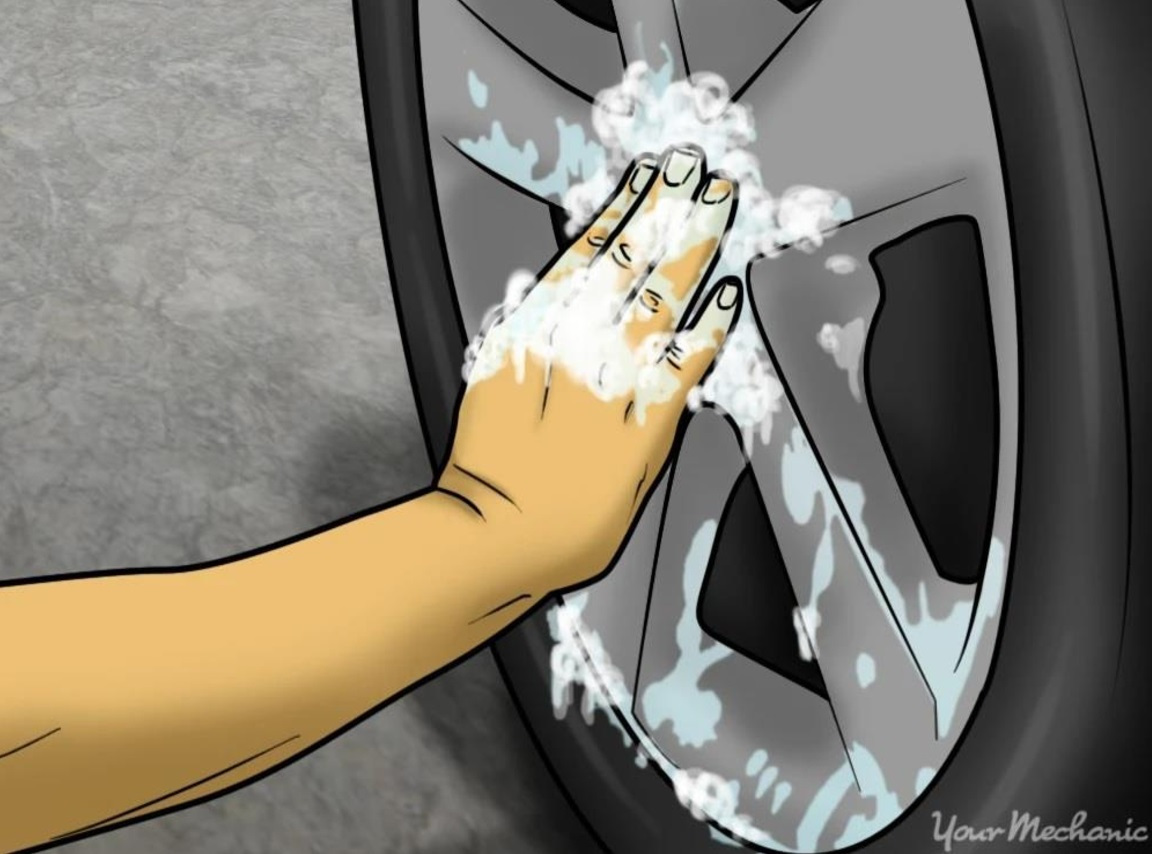
Step 6: Wash the wheels/tires last
Dirt, grime (ingrained dirt), and brake dust are capable of accumulating significantly on your wheels. Wash the wheels last to ensure you are not contaminating your wash water with abrasive dirt that shall scratch your paintwork (Unrau, 2016).
Photo Credit: Unrau (2016)
Step 7: Rinse your car using clean water
Use a hose or buckets full of clean water to rinse your car. Start from the top. Rinse until there are no suds (soapy water) in the rinse water.
Rinse every panel thoroughly. Any soap leftover is capable of causing residue/streaks on your paintwork once it dries (Unrau, 2016).
Part 3: Dry the Car Using Microfiber Towels
Step 1: Wipe each exterior part using a drying Cafaibber microfiber towel
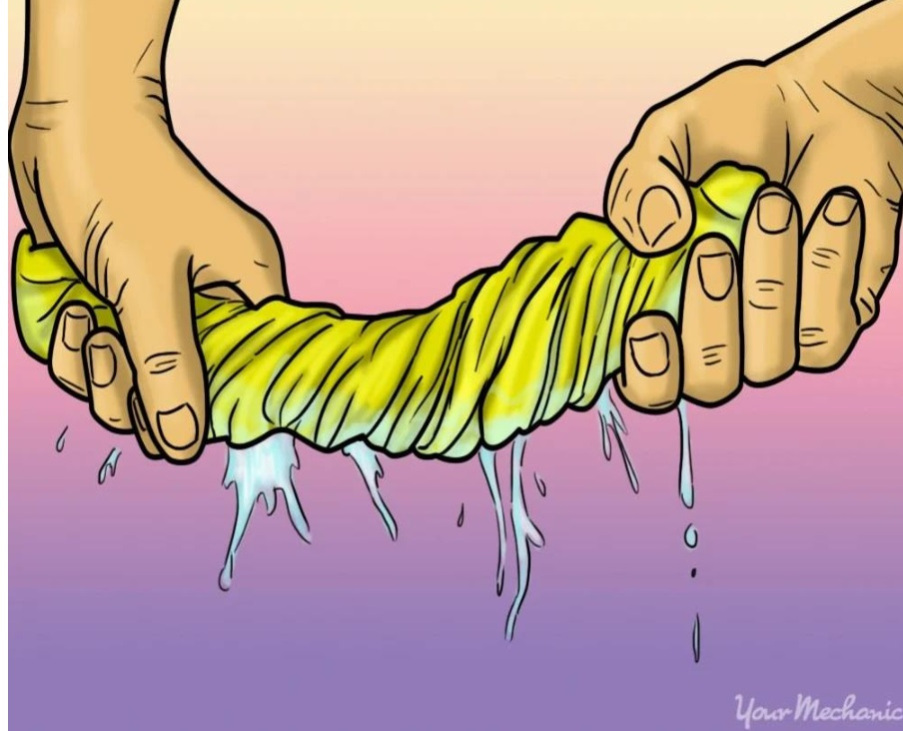
Wet the drying towel using clean water. Then, wring it out as best as you can. Wipe every panel and window separately, beginning from the top (Unrau, 2016).
Photo Credit: Unrau (2016)
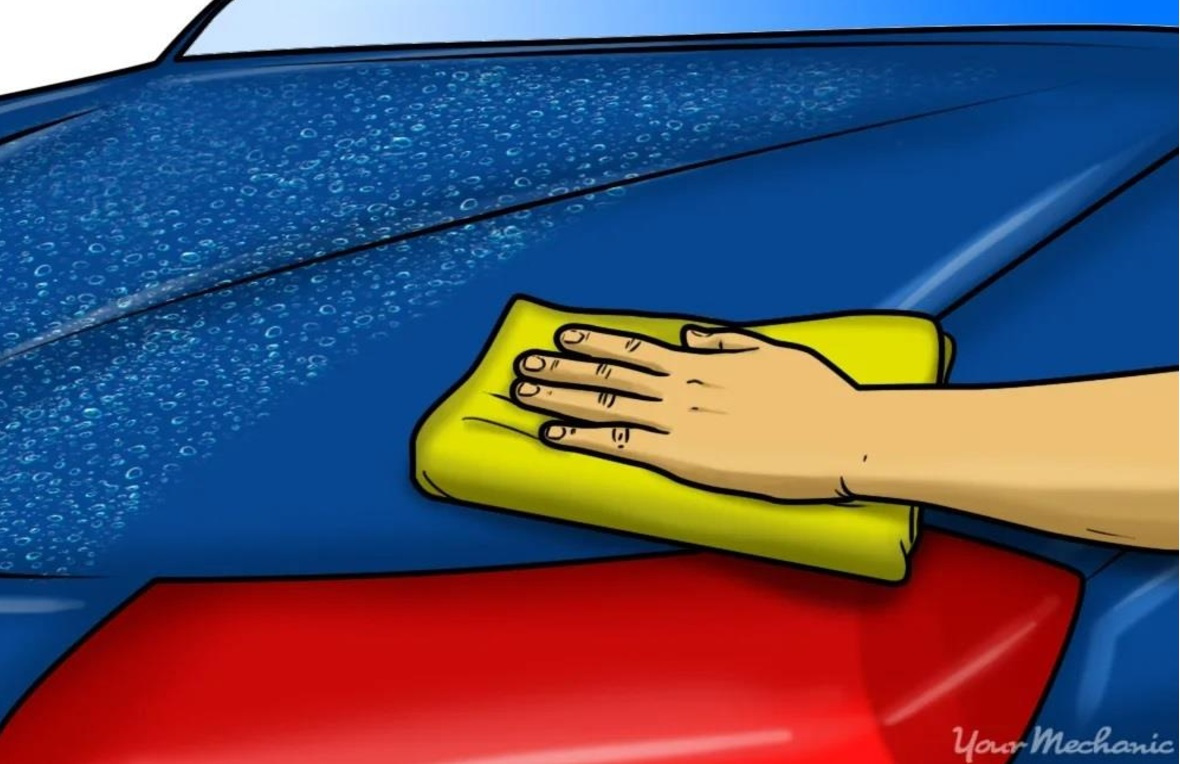
Step 2: Maintain the towel open
Ensure the towel is as open as you can while you are wiping using an open hand to cover the most surface area (Unrau, 2016).
Step 3: Wring out the towel each time it gets sopping wet
Photo Credit: Unrau (2016)
Step 4: Rinse the towel if it becomes dirty
If the towel becomes soiled from any residual dirt, rinse it out comprehensively using clean plain water. Please do not use soapy water on this towel. Or else, you will get streaks on the car when it dries.
Rinse downward the car. Rinse the bottom panels and the wheels last (Unrau, 2016).
Step 5: Replace your towel with a clean one if it gets dirty
Step 6: Wipe again or allow air dry
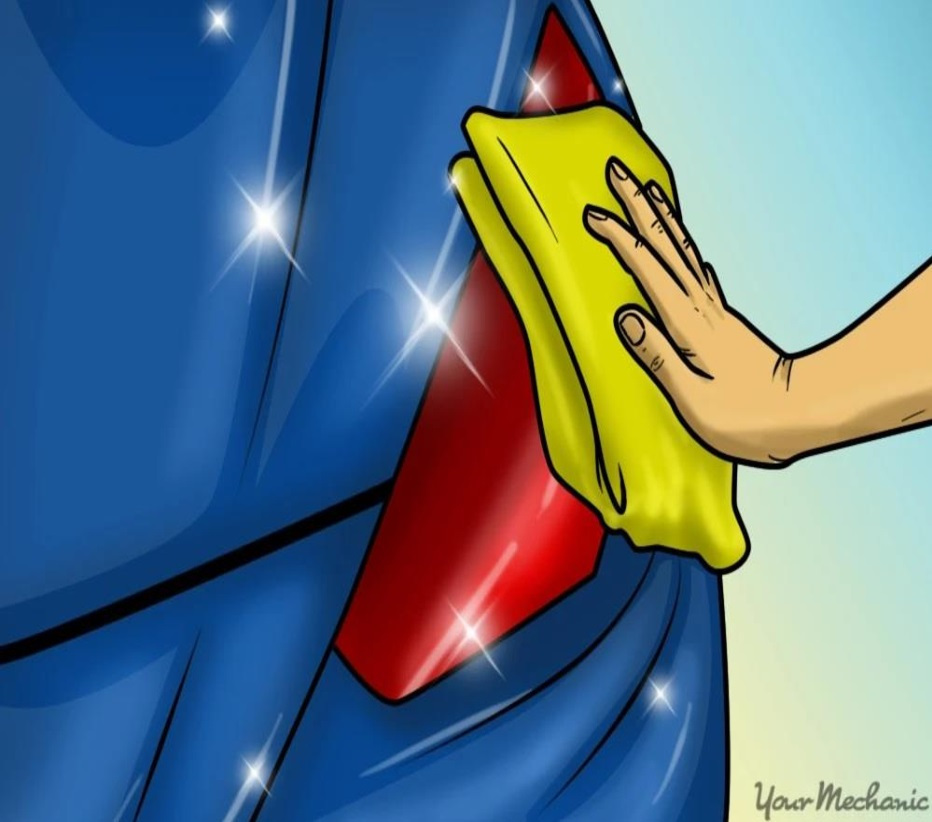
After wiping all panels, there could be a thin film of water on them. You may choose to allow the thin film of water to dry on its own. Nevertheless, the best finish is to wipe the thin film of water using a clean, dry lattice or ribbed Cafaibber towel.
Wiping with the dry lattice or ribbed Cafaibber towel will collect the last water traces. As a result, the surface will be left not only streak-free, but also shiny (Unrau, 2016).
Photo Credit: Unrau (2016)
For information about how to clean a car floor mat/s, please click on (or tap on) the following link: https://www.yourmechanic.com/article/how-to-clean-car-floor-mats
Notably, use a Cafaibber Car Floor Cleaning Towel and CaFaibber Car Floor Drying Towel to clean and dry car floor/s that does not have a mat/s.
Cleaning Using Car Wash Sprays (waterless method)
Materials required
(a) Microfiber towels
(b) Waterless car wash kit (Unrau, 2016).
Step 1: Spray the cleaning solution on a small area of the car
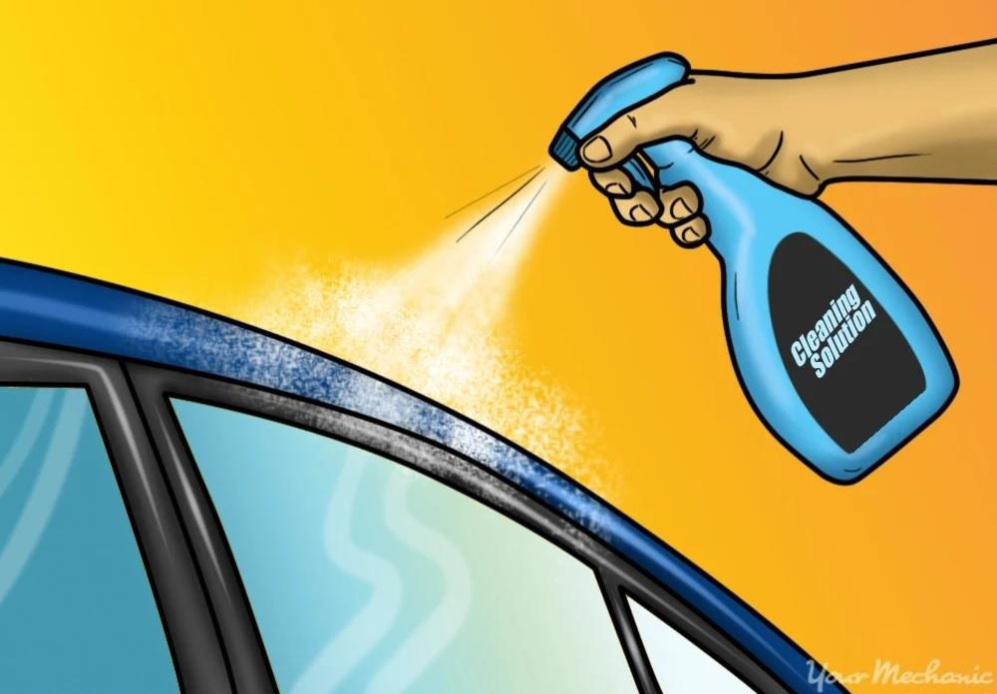
Step 2: Wipe the cleaning solution/spray off
Wipe it in two ways: The first is side to side. The second is up and down.
That way, you will manage to capture the most amount of grease as well as grime (ingrained dirt) (Unrau, 2016).
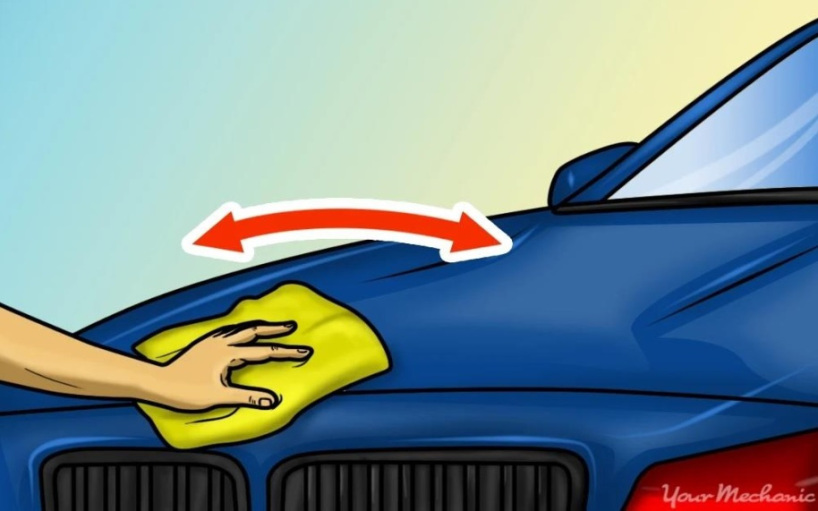
Step 3: Repeat the process around the car
Perform steps one (1) and two (2) all over the car. Eventually, you will have a shiny new ride (Unrau, 2016).
Cleaning the Interior of Your Car
It is easy to clean the inside of your car to a high standard with Cafaibber microfiber towels.
Step 1: Remove debris
Remove any debris inside your car, including empty drink bottles.
Step 2: Use Cafaibber Car/Aircraft/Motorcycle/Tuk-tuk/Bicycle Dust Cleaning Towel
Use it to collect dust from the dashboard, centre console, and any other plastic areas.
Step 3: Clean leather seats using Cafaibber Dust Cleaning Towel/s
Microfiber towels are great for cleaning leather seats. That is because they are specially designed to collect dust and dirt.
Step 4: Clean interior windows, plastic covers on dashboard, and grubby buttons
Use another damp glass towel to clean interior windows and ribbed microfiber towel from Canagoza to clean plastic covers on dashboard and grubby buttons.
Step 5: Dry and polish
Use a dry Cafaibber Glass and ribbed/lattice Cafaibber towel to wipe any moisture away from interior windows and plastic covers respectively. In fact, polish the glass to a smear-free finish (LMB Supplies, 2020).
G. Computer Screen Cleaning
Step 1
Ensure your computer (laptop, desktop...) is turned off. In fact, ensure there is no power supply, including through disconnecting the power adapter/removal of battery/unplugging.
Allow the computer to cool down. Cleaning a screen that is in use might result in damage.
Two, turning off the computer will enable you to see dirt, dust, and grime better (Whoosh!, 2018).
Three, a hot or warm screen will make the cleaning solution to evaporate rapidly (Digital Innovations, 2014).
Step 2
Get a Clear Laightt Screen/Mobile Phones/Computer/Laptop/Tablets/TV Cleaning Towel from Canagoza. Clear Laightt Screen Towel does not leave lint and is highly soft (Whoosh!, 2018).
Step 3
Wipe the screen gently with the Clear Laightt Screen Towel. Some sweeps with the towel should remove dust and loose particles clinging to the screen (Whoosh!, 2018).
Notably, pressing too hard (exerting high pressure) may result to damage (Digital Innovations, 2014).
Step 4
For some of the tougher spots, you will require a liquid solution (a lab-tested cleaning solution). The screen cleaning solution should not contain alcohol, ammonia, or bleach. It is a solution that is designed to not only clean the screens, but also keyboards, phones, tablets and TVs screens/displays.
Apply/spray the cleaning solution onto the Clear Laightt Screen Towel.
Please never apply/spray directly on the computer screen. You may spray too much cleaning solution that may increase the risk of the cleaning solution getting inside the computer. The result can be a temporary or permanent and costly damage (Digital Innovations, 2014).
An alcohol-based, ammonia-based, or bleach-based cleaner has several weaknesses. It can damage the protective coating on most touch screens and ruin your device.
Two, it can leave a streaky residue.
The only cleaner(s) safe for your screen is a lab-tested cleaner meant for liquid-crystal display (LCD) screens (Digital Innovations, 2014; Get Clean, 2017).
Ensure you do not soak or make the towel too wet. In case you accidentally use excessive cleaning solution, wring out the Clear Laightt Screen Towel until it is only slightly moist.
Gently wipe the screen with the wet microfiber cloth from top to bottom in a circular motion until all tougher spots/grime/specks are removed.
Please never scrub the screen, as this action can cause pixel burnout (Get Clean, 2017).
Step 5
Use a dry Clear Laightt Screen Towel to wipe away any remaining marks and/or streaks on your screen. It is crucial not to allow any liquids sit on the screen for a considerable time, as this is capable of damaging the computer screen (Digital Innovations. (2014).
Step 6
Clean your keyboard if it is dirty. Shake it over a trash can. Consequently, grab a can of compressed air (or computer vacuum cleaner) to remove dirt particles lurking under the keys.
To clean tougher spots (to remove grime), spray/apply a cleaning solution (a lab-tested cleaner) onto a clean Clear Laightt Screen Towel or Clear Laightt Outer Surfaces Cleaning Towel. Go over the keys.
Use a keyboard swab to clean crevices. You may apply (not too much, but a small amount) cleaning solution on keyboard swabs.
To clean your mouse, apply (a small amount) the same lab-tested cleaner on the keyboard swab. Then, run the swab over the mouse feet/skate and via any cracks as well as crevices.
In addition, apply/spray (a small amount) of the lab-tested cleaner on a Clear Laightt Screen Towel or Clear Laightt Outer Surfaces Cleaning Towel. Then, go over the body of the mouse and the cord (Steele, 2020).
Step 7
Clean plastic edges/outer surfaces/back cover using a Clear Laightt Computer/Laptop/Tablet/TV Outer Surfaces/Back Covers Cleaning Towel.
For tougher spots (grime), apply/spray (a small amount) of the lab-tested cleaner on the Clear Laightt Outer Surfaces/Back Covers Cleaning Towel. Then, go over the plastic edge/outer surfaces.
Please do not use the Clear Laightt Outer Surfaces Cleaning Towel to clean screen (Whoosh!, 2018).
H. Mobile Phone/Tablet Screen Cleaning
Maintaining your mobile phone screen clean is just as crucial as cleaning screens and other surfaces of televisions as well as computers. Cleaning mobile devices, however, may involve more than cleaning big screens.
Simply think of the different surfaces you touch in a day (Whoosh!, 2018). Think about light switches, remote controls, doors, money, shaking of hands, vehicle surfaces, and along with many other surfaces.
The bacteria and other dirt collected during your daily activities ends up on your mobile phone/s and/or tablet/s.
Susan Whittier is the director of clinical microbiology at NewYork- Presbyterian Hospital and Columbia University Medical Center. She says, "All cellphones are going to have bacteria on them because we hold them up to our face" (Brown, 2019).
Dr. Charles Gerba is a professor of microbiology at the University of Arizona, Tucson, Arizona, United States. Dr. Gerba says, "We touch more surfaces than any generation in history, from ATM machines to self-checkout counters" (Brown, 2019).
Dr. Gerba further says, "So, you're picking up germs all the time on your hands and fingers, putting them on your cellphone and bringing them close to your nose, mouth or eyes" (Brown, 2019).
Odds are that you do not clean your mobile phone/s and/or tablet/s well enough or frequently.
Step 1
To clean your mobile phone, turn your screen off. That way, you will see dust and debris. Also, turning off your screen will prevent damage to pixels of your screen.
Step 2
Wipe the screen gently with the Clear Laightt Screen Towel. Some sweeps with the towel should remove dust and loose particles clinging to the screen (Whoosh!, 2018).
Notably, pressing too hard (exerting high pressure) may result to damage (Digital Innovations, 2014).
Step 3
For some of the tougher spots, you will require a liquid cleaning solution (a lab-tested cleaning solution). The screen cleaning solution should not contain alcohol or ammonia.
Apply/spray the cleaning solution on Clear Laightt Screen Towel. Ensure you do not soak or make the towel too wet. In case you accidentally use excessive cleaning solution, wring out the Clear Laightt Screen Towel until it is only slightly moist.
Gently wipe the screen with the wet towel.
Please never scrub the screen. Please also avoid introducing any liquid cleaner in charging ports (Baker et al., 2020; Get Clean, 2017).
Step 4
Use a keyboard swab to clean out dirt from ports and headphone jacks (Whoosh!, 2018).
Step 5
Use a dry and clean Clear Laightt Screen Towel to dry and shine your screen (Whoosh!, 2018).
Step 6
In case your mobile phone has a case, clean/wipe it using the wet Clear Laightt Screen Towel. Then, use a dry/clean Clear Laightt Screen Towel to dry the case.
You may choose to wipe the plastic edges/back cover of your mobile phone using a wet Clear Laightt Outer Surfaces/Back Covers Towel. Consequently, use a dry/clean Clear Laightt Outer Surfaces/Back Covers Towel to dry the plastic edges/back cover (Muyanja, 2020).
Apple Inc. provides steps for cleaning a mobile phone:
Step 1
Unplug all cables. Then, turn off your mobile phone.
Step 2
Use a slightly damp (use water, preferably distilled water) suede towel (Clear Laightt) to wipe the screen gently (Apple Inc., 2020).
Step 3
In case there are tough stains, apply/spray a suede towel with warm soapy water: The soap should be mild (gentle). Use the towel to wipe the screen gently.
Please do not get moisture in openings. Avoid using unauthorized cleaning solutions. Avoid also using compressed air (Apple Inc., 2020).
I. Television (abbreviated as TV) Screen Cleaning
In order to effectively catch each second of your favorite TV show/sport/news, you will obviously require a screen that does not have dust, dirt, as well as a TV screen that is fingerprint-free. Nonetheless, utilizing the incorrect cleaning method may cancel out any applicable warranty.
To clean your TV efficiently, you will require a dry Clear Laightt Screen Towel (Rothman, 2019).
Step 1
Turn off the TV. One reason is because it makes it simpler to see dirty as well as dusty areas.
Step 2
Use the dry Clear Laightt Screen Towel to wipe the screen gently. Please avoid pressing hard on the screen during wiping (Whoosh!, 2018).
Step 3
For some of the tougher spots (with tough stains or grime), you will require a liquid solution (a lab-tested cleaning solution). Ensure you do not soak or make the towel too wet. Apply/spray the cleaning solution onto the Clear Laightt Screen Towel.
Please never spray the cleaning solution directly on the TV screen. It is because you may spray too much cleaning solution that may increase the risk of the cleaning solution getting inside the TV. The result can be a short/permanent and costly damage (Digital Innovations, 2014).
In case you accidentally use excessive cleaning solution, wring out the Clear Laightt Screen Towel until it is only slightly moist.
Gently wipe the screen with the wet microfiber towel from top to bottom in a circular motion until all tougher spots/grime/specks are removed.
Please never scrub the screen (Get Clean, 2017).
Step 4
Use a dry and clean Clear Laightt Screen Towel to dry and shine your TV screen (Whoosh!, 2018).
Step 5
Wipe the plastic edges/outer surfaces/buttons/vents with a Clear Laightt Outer Surfaces Cleaning Towel. Please do not use the Clear Laightt Outer Surfaces Cleaning Towel to clean screen (Whoosh!, 2018).
Step 6
For tougher stains, clean the plastic edges/outer surfaces/buttons with a lab-tested cleaning solution and a Clear Laightt Outer Surfaces Cleaning Towel.
Again, ensure you do not soak or make the towel too wet. Apply/spray the cleaning solution onto the Clear Laightt Screen Towel.
Again, please do not use the Clear Laightt Outer Surfaces Cleaning Towel to clean the screen of your TV (Whoosh!, 2018).
J. Cleaning a Remote Control
Step 1
Remove the batteries. Then, turn the device upside down so that the buttons are facing downward (Willcox, 2020).
Step 2
Shake or tap it gently against your palm. The aim is to dislodge any debris that may have fallen between the keys (Willcox, 2020).
Step 3
Use a toothbrush to brush away debris from around the remote control buttons. Please work from the top to the bottom of the remote control (Willcox, 2020).
Step 4
Spray or apply a lab-tested cleaning solution on a Clear Laightt Outer Surfaces Cleaning Towel. Make sure you do not soak or make the towel too wet.
Please never spray the cleaning solution directly on the remote control. In case you accidentally use excessive cleaning solution, wring out the towel until it is only slightly moist. Then, gently wipe the remote with the wet towel (Betts, 2020; Digital Innovations, 2014).
Step 5
For tight spaces, you will need a keyboard swab. Spray or apply the lab-tested cleaning solution on the swabs. Work on the spaces to remove ingrained dirt (Betts, 2020).
Step 6
In case there is still stubborn debris lodged deeper in the keys, gently remove them using a dry toothbrush or wooden toothpick (Willcox, 2020).
Step 7
After completing the cleaning of the remote control, allow it to air dry (Willcox, 2020).
Step 8
After the remote control has air dried, re-install the batteries. Finally, wash your hands (Willcox, 2020).
K. Hair Drying
Microfiber is friction-free. It can thus assist to keep hair smooth and healthy.
A microfiber hair wrap is soft, fast-drying, and significantly absorbent.
There are several types of microfiber hair wraps. They include hair drying cap, turban, and towel.
Given microfiber can absorb several times its weight in water, a La Donna Hair Drying Cap from Canagoza works efficiently to dry your tresses (a tress is a long lock of a woman's hair). You can twist a hair drying cap and button it in the back to keep it out of the way while you apply makeup or get ready for bed (Brickell, 2020).
Photo Credit: Brickell (2020).
Microfiber Hair Drying Cap
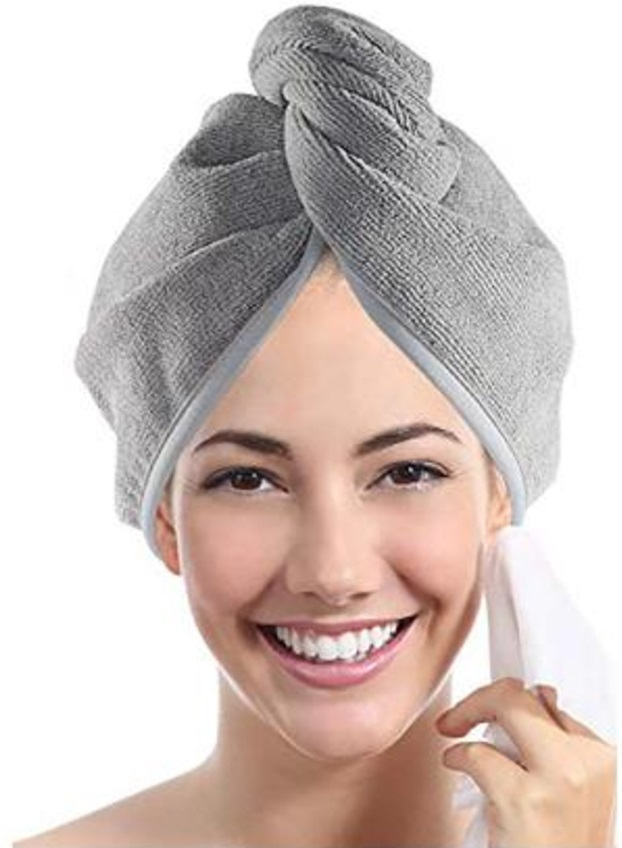
A microfiber hair drying cap is gentle on hair. The cap thus wicks moisture without roughing up the cuticle.
Rough up means the act of causing hair to stand up by rubbing against the grain.
Notably, ensure you are blotting your hair rather than rubbing it. Rubbing it may cause damaging breakage. An additional potential outcome of rubbing is split ends.
Please note: Blot means to dry (a wet surface or substance) using an absorbent material (Swanson, 2020).
Microfiber hair drying caps are cut into shape to best fit around your head. They may come with a button at the back. You are thus empowered to secure the hair drying cap in place. You are thus left free to go about your morning, afternoon, or evening without having to frequently readjust.
Microfiber hair drying cap helps to remove surplus moisture from strands at a significant rate (Winter, 2020).
Microfiber hair drying cap may help to reduce frizz (formation of hair into a mass of small, tight curls) and improving natural curl definition (“The best hair towels on Amazon, according to hyperenthusiastic reviewers,” 2020).
The idea of a hair turban is simple. Rather than utilizing an ordinary towel to dry your hair, wrap it in the turban. The turban is specifically made for the task of drying your hair.
After wrapping the turban, twist it prior to securing with a button/snap.
A turban eradicates friction when drying the hair. The result is that the cuticle of the hair remains intact. Simultaneously, the cuticle locks in moisture (“How a towel turban changed my life,” 2020).
How to Wrap Wet Hair and Create a Towel Turban
Step 1: Choose La Donna Hair Towel
A microfiber towel is soft and may not damage your hair. It is also crucial to pick a towel that is wide enough such that it can reach from the nape of your neck to your hairline. Simultaneously, the towel should be long enough to fall past your shoulders.
Step 2: Remove excess water
Aim to accelerate the drying process and prevent your wrap from leaking. To achieve this, remove excess water from your strands.
Gently blot your hair with your microfiber towel to soak up some of the water. If you have thick or long hair, flip your hair over during this step to ensure you go over all of your tresses/curls with the towel.
Step 3: Detangle your strands
Skipping this step will cause your knots and tangles to be increasingly knotted and tangled.
Use a wide-tooth comb to gently comb through your damp strands ("How to wrap wet hair and create a towel turban," n.d.).
Step 4: Flip your hair
Bend forward to flip your hair forward such that it hangs in front of your face. If needed, use your comb to assist in guiding your strands forward.
Step 5: Position your towel
Position your towel such that your head is at its center. Ensure the edge is aligned with your nape. If needed, adjust to ensure equal length on either side of your head.
Bring every side toward the front of your head. Bring them together at the centre of your hairline. Ensure every side is positioned firmly around your head, applying slight pressure, which will eventually determine if your hair dries.
If you desire, tuck the towel behind your ears.
Step 6: Twist
Start to twist the length of your towel. Begin at the center of your hairline. Twist until you reach the ends ("How to wrap wet hair and create a towel turban," n.d.).
Step 7: Flip it back
Stand upright. Fold your towel (and hair in the process) backward. Ensure it falls over your head and hangs down behind you.
Step 8: Secure in place
If needed, use a clip to lock the end of the towel in place. Doing so will prevent it from shifting.
Step 9: Wait it out
Wait for around 30-60 minutes for your hair to dry.
If your hair is still wet after around 60 minutes, substitute your towel with a dry one. That is because the one already in use has likely become saturated with water to dry your hair further (Rodulfo, 2019).
Step 10: Flip and remove
Flip your head forward again. Then, unwrap gently your towel. To a large extent, your hair should be dry at this point ("How to wrap wet hair and create a towel turban," n.d.; Rodulfo, 2019).
Cleaning and Maintenance of Microfiber Cloths/Towels
1. Wash and dry microfiber towels/cloths separately from all other laundry
Without a shadow of a doubt, microfiber has a charge. Therefore, it will attract dirt, hair, and lint from other laundry. The outcome can be that the efficiency of the microfiber cloth/towel is reduced (University of California San Francisco, 2015).
2. Separate colors of the microfiber towels
Please do not wash dark and light color(s) together.
3. Please clean your microfiber cloth/s or towel/s regularly
Wash heavily soiled microfiber cloths and mop heads in warm water with a liquid mild (gentle) detergent.
Please do not use powder detergent. Powder traps in fibers, which can cause scratch surfaces during cleaning.
4. Lightly soiled cloths/towels may be washed in cool water or on the gentle cycle (for machine washing)
5. Please do not use fabric softener
Fabric softeners contain oils. These oils clog up microfiber cloths/towels. As a result, the microfiber cloths/towels are made less effective in your next use.
In fact, choose a mild (gentle) liquid detergent with no scent/laundry additives (University of California San Francisco, 2015).
6. Please do not use bleach
Bleaching will reduce the lifespan of your microfiber cloth/towel through breaking down of the polyester and nylon fibers (University of California San Francisco, 2015).
7. Hang outside on a clothesline to dry
Most microfiber cloths/towels dry quickly, so hang them outside on a clothesline to dry after washing and rinsing.
Alternatively, tumble dry with low or no heat, or air dry.
Please do not dry with high heat. Drying your microfiber towels with high heat has a high potential of damaging the polyester and nylon fibers (University of California San Francisco, 2015).
In general, experts recommend washing bath towels after two or three uses. After each use, be sure to dry your bath towel outside (Norris, 2019).
8. Please aim to use color-coded cloths for different areas of your facility/home
The aim is to ensure you do not transfer germs from one area to a different area (University of California San Francisco, 2015).
9. Weight of Microfiber Towel/s or Cloth/s
A microfiber towel or cloth of less than 400 grams per square meter (GSM) may not last long and will absorb less when compared to a microfiber towel of 400GSM or above.
A microfiber towel of 800GSM is expensive because it weighs more than a microfiber towel of, for example, 200GSM of the same size and weave type.
A microfiber towel of 800GSM, simultaneously, is likely to last longer than a microfiber towel of 200GSM.
References
Please click on (or tap on) the following link to access/view the "References" in APA Seventh (7th) Edition: References in APA Seventh Edition -- Microfiber Towels.doc